Timer 定时器
Timer 是 JDK 自带的一个定时器类
基本用法
- 创建任务定时器对象
- 创建任务
- 启动任务
```java
/**
- 创建定时器示例
- /
private static Timer timer = new Timer();
/**
- 创建任务实现类
- /
static class MyTask extends TimerTask {
@Override
public void run() {
}System.out.println("定时任务开始执行");
}
public static void main(String[] args) {
// 启动任务
timer.schedule(new MyTask(), DateUtil.parse(“2024-02-04 16:41”, “yyyy-MM-dd HH:mm”));
}
> 内部原理

1. 在 Timer 中定义了 TaskQueue 任务队列(小顶堆),用于存放任务
2. 定义 TimerThread 线程,并在线程中使用 while 循环持续监测是否有新的任务加入到队列中
3. 队列中的任务根据下一次执行时间 nextExecutionTime 构造小顶堆,每次优先取时间最小的任务进行处理
```java
public class Timer {
    // 任务队列
    private final TaskQueue queue = new TaskQueue();

    // 调度线程
    private final TimerThread thread = new TimerThread(queue);

    // 构造方法
    public Timer(String name) {
        thread.setName(name);
        // 启动调度线程
        thread.start();
    }

    // 添加任务
    public void schedule(TimerTask task, Date time) {
        sched(task, time.getTime(), 0);
    }
}

class TimerThread extends Thread {
    public void run() {
        try {
            mainLoop();
        }  finally {
            synchronized(queue) {
                newTasksMayBeScheduled = false;
                queue.clear();
            }
        }
    }
    private void mainLoop() {
        while (true) {
            try {
                synchronized(queue) {
                    while (queue.isEmpty() && newTasksMayBeScheduled)
                        // 等待任务加入
                        queue.wait();
                    ……
                    task = queue.getMin();
                    ……
                }
                if (taskFired)
                    // 运行任务
                    task.run();
            }  catch(InterruptedException e) {
            }
        }
    }
}
任务执行过程
private void mainLoop() {
        while (true) {
            try {
                TimerTask task;
                boolean taskFired;
                synchronized(queue) {
                    // 等待队列不为空
                    while (queue.isEmpty() && newTasksMayBeScheduled)
                        queue.wait();
                    if (queue.isEmpty())
                        break;

                    long currentTime, executionTime;

                    // 获取时间最近的任务
                    task = queue.getMin();
                    synchronized(task.lock) {
                        if (task.state == TimerTask.CANCELLED) {
                            queue.removeMin();
                            continue;
                        }

                        // 获取当前时间、任务执行时间
                        currentTime = System.currentTimeMillis();
                        executionTime = task.nextExecutionTime;

                        // 是否已经到达执行时间
                        if (taskFired = (executionTime<=currentTime)) {
                            if (task.period == 0) {

                                // period 为0代表只执行一次,移出队列
                                queue.removeMin();
                                task.state = TimerTask.EXECUTED;
                            }  else {

                                // 计算下一次执行时间
                                queue.rescheduleMin(
                                  task.period<0 ? currentTime   - task.period
                                                : executionTime + task.period);
                            }
                        }
                    }

                    // 未到达执行时间则等待
                    if (!taskFired)
                        queue.wait(executionTime - currentTime);
                }

                // 执行任务(在当前线程中执行,将会阻塞影响后续任务执行)
                if (taskFired)
                    task.run();
            }  catch(InterruptedException e) {
            }
        }
    }
Quartz 任务调度
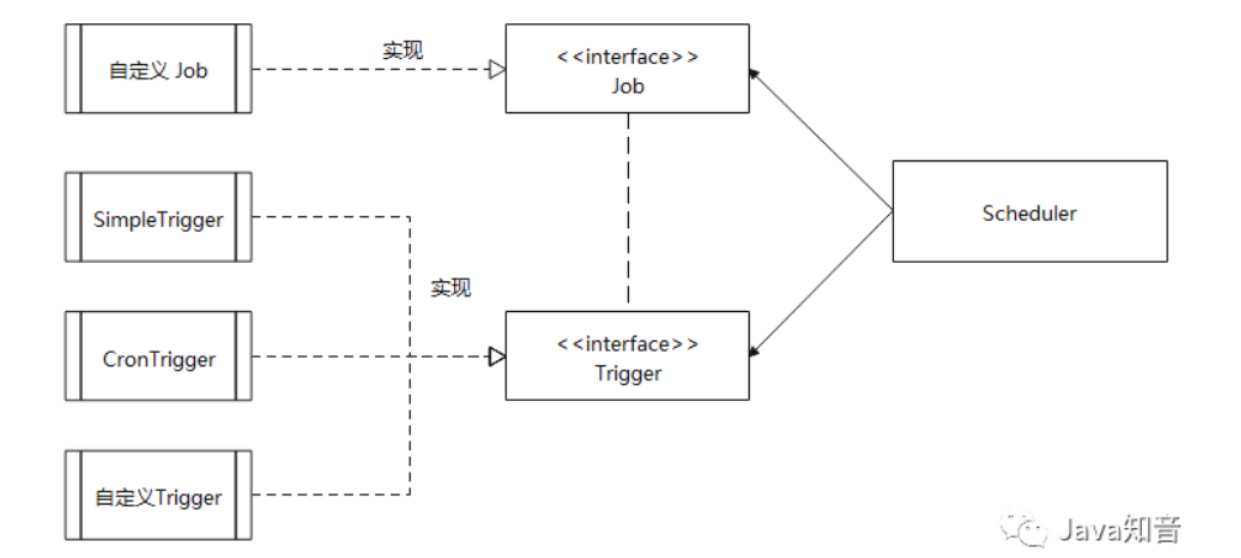
Quartz 的核心类有以下三部分:
- 任务 Job : 需要实现的任务类,实现
execute()方法,执行后完成任务。 - 触发器 Trigger : 包括
SimpleTrigger和CronTrigger。 - 调度器 Scheduler : 任务调度器,负责基于
Trigger触发器,来执行 Job任务。
基本使用
1、导入依赖
<dependency>
  <groupId>org.springframework.boot</groupId>
  <artifactId>spring-boot-starter-quartz</artifactId>
</dependency>
2、直接在 service 中使用
@Service
public class JobHandler {

    @Resource
    private Scheduler scheduler;

    @PostConstruct
    private void test() throws SchedulerException {
        // 1、定义 job
        JobDetail jobDetail = JobBuilder
        .newJob(JobOne.class)
        .withIdentity("jobName", "jobGroup")
        .build();
        // 2、定义触发器
        Trigger trigger = TriggerBuilder.newTrigger()
        .withIdentity("triggerName", "triggerGroup")
        .withSchedule(CronScheduleBuilder.cronSchedule("0/1 * * * * ?").withMisfireHandlingInstructionDoNothing())
        .build();
        // 3、放入调度器
        scheduler.scheduleJob(jobDetail, trigger);
    }
}
xxl-job 任务调度
官方文档:https://www.xuxueli.com/xxl-job/#《分布式任务调度平台XXL-JOB》
仓库地址:https://gitee.com/xuxueli0323/xxl-job.git
使用流程
1、下载源码
git clone https://gitee.com/xuxueli0323/xxl-job.git2、使用 IDEA 打开项目
xxl-job-admin:调度中心
xxl-job-core:公共依赖
xxl-job-executor-samples:执行器Sample示例(选择合适的版本执行器,可直接使用,也可以参考其并将现有项目改造成执行器)
    :xxl-job-executor-sample-springboot:Springboot版本,通过Springboot管理执行器,推荐这种方式;
    :xxl-job-executor-sample-frameless:无框架版本;
3、创建对应的数据库 xxl_job ,执行 sql 文件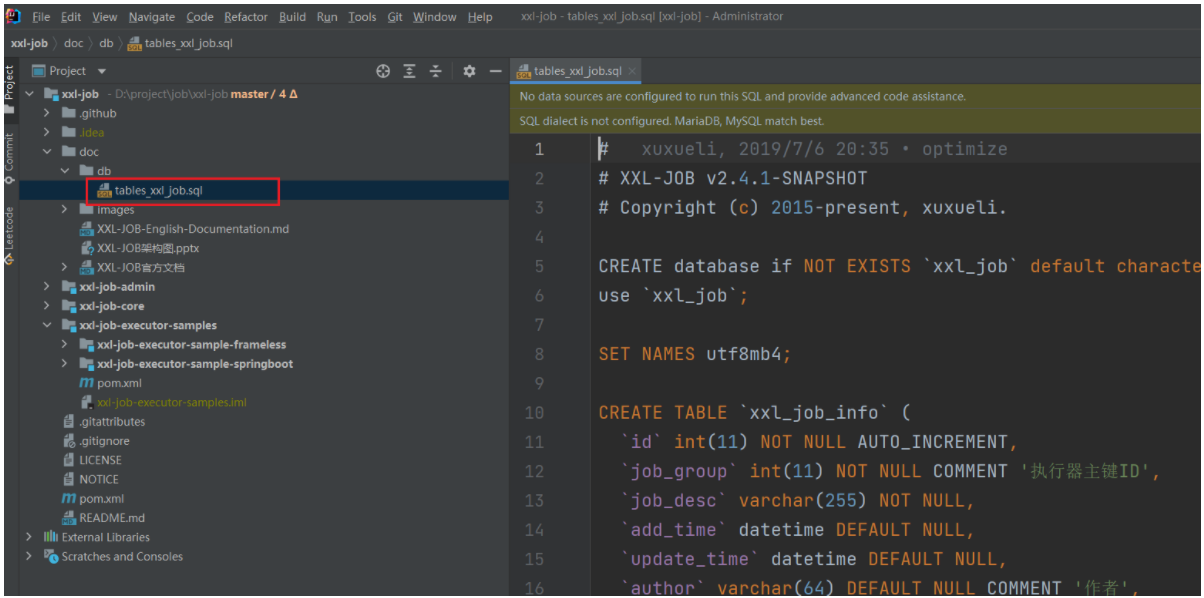
4、修改配置文件中的账号密码信息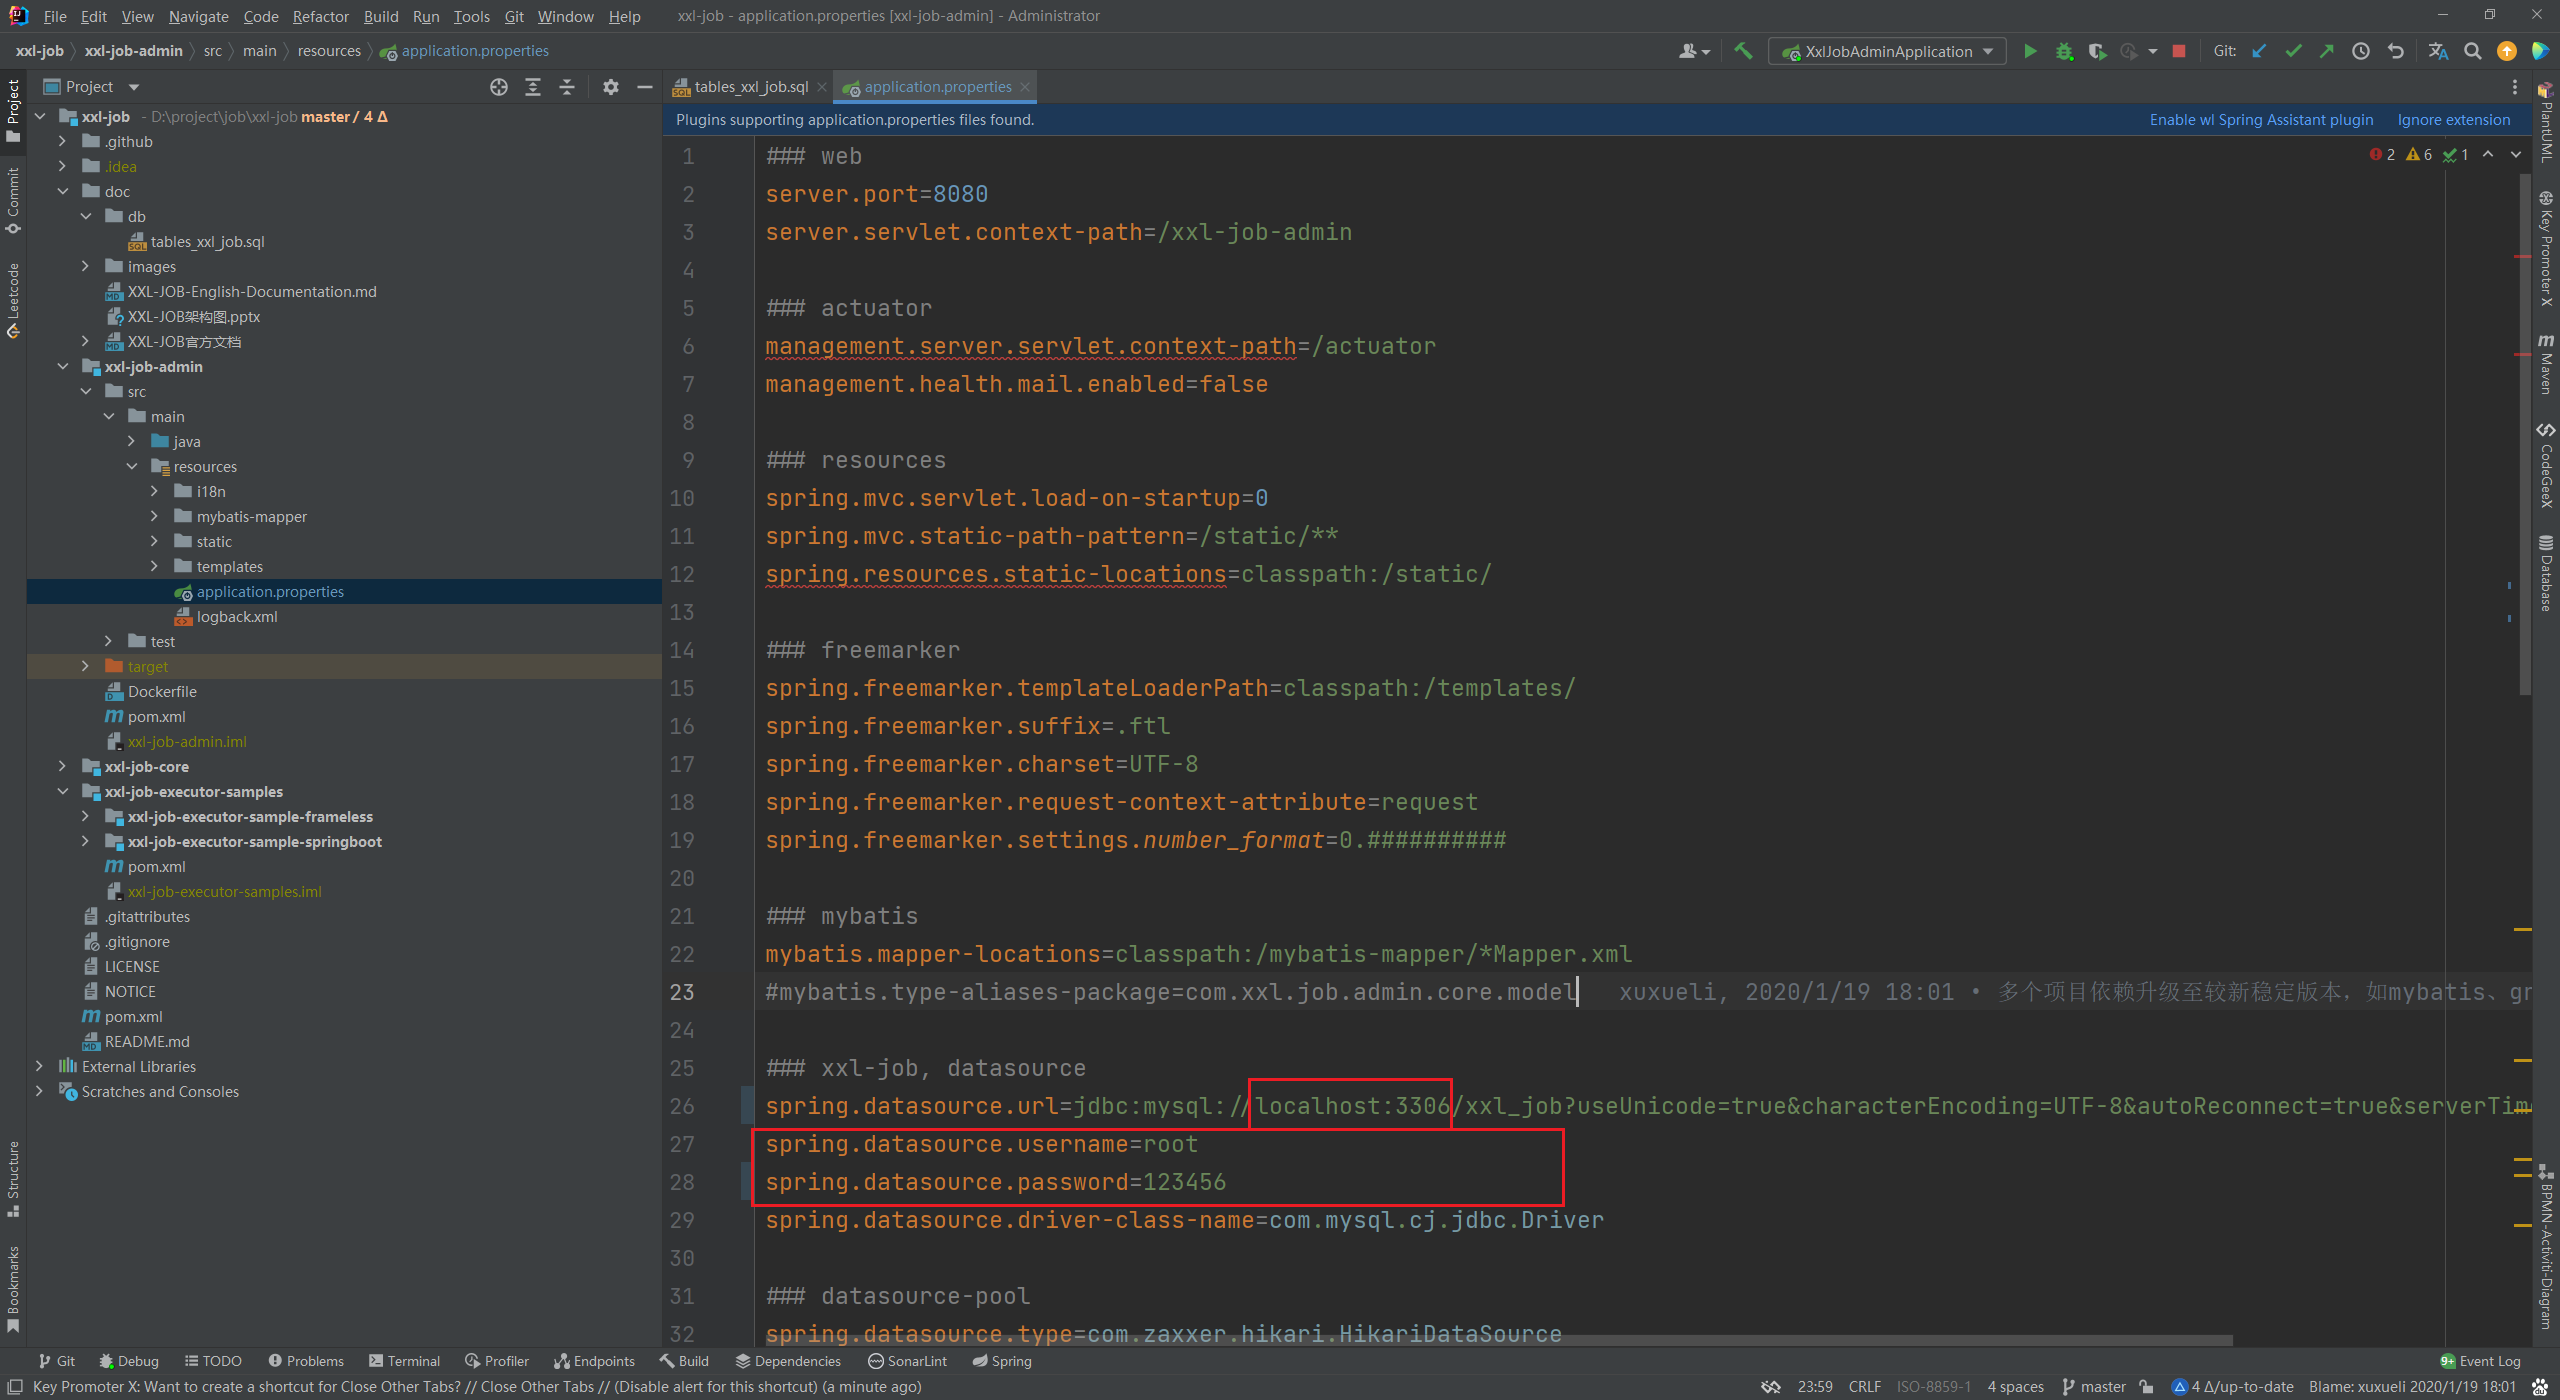
xxl-job-admin 是一个前后端不分离的项目,启动后访问 http://localhost:8080/xxl-job-admin/toLogin 即可进入调度中心页面,账号密码:admin/123456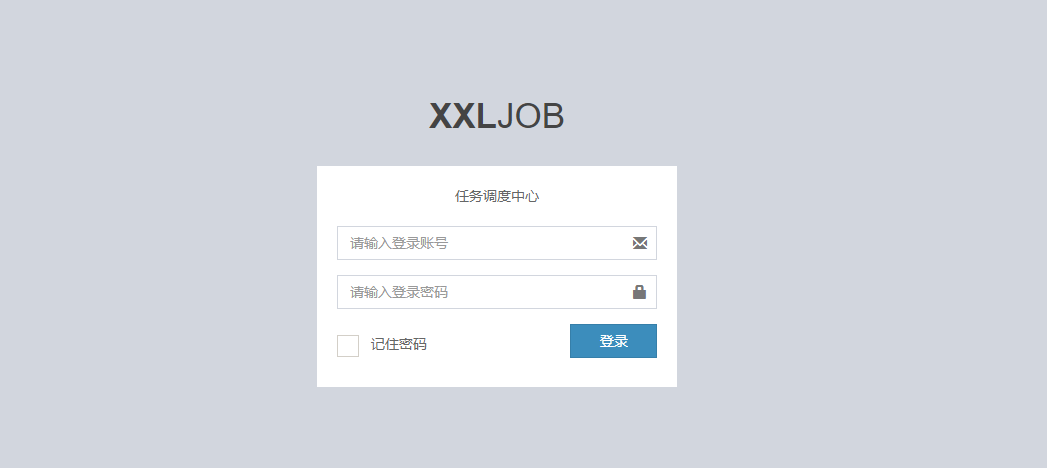
执行器配置
任务也是配置在执行器中
1、参考 xxl-job-executor-sample-springboot 示例代码,导入依赖
<!-- http://repo1.maven.org/maven2/com/xuxueli/xxl-job-core/ -->
<dependency>
    <groupId>com.xuxueli</groupId>
    <artifactId>xxl-job-core</artifactId>
    <version>${ 最新稳定版本} </version>
</dependency>
2、修改配置文件
- xxl.job.admin.addresses:指定调度中心的地址
- xxl.job.accessToken:调度中心 token
- xxl.job.executor.appname:执行器名称
- xxl.job.executor.ip:执行器 ip 可自动获取,可不填
- xxl.job.executor.port:执行器端口需指定(对应 netty 端口)
调度中心触发任务的时候,会直接向 executor 的 ip + 端口 发送请求,由 netty 对内容进行读取并转发到对应的方法上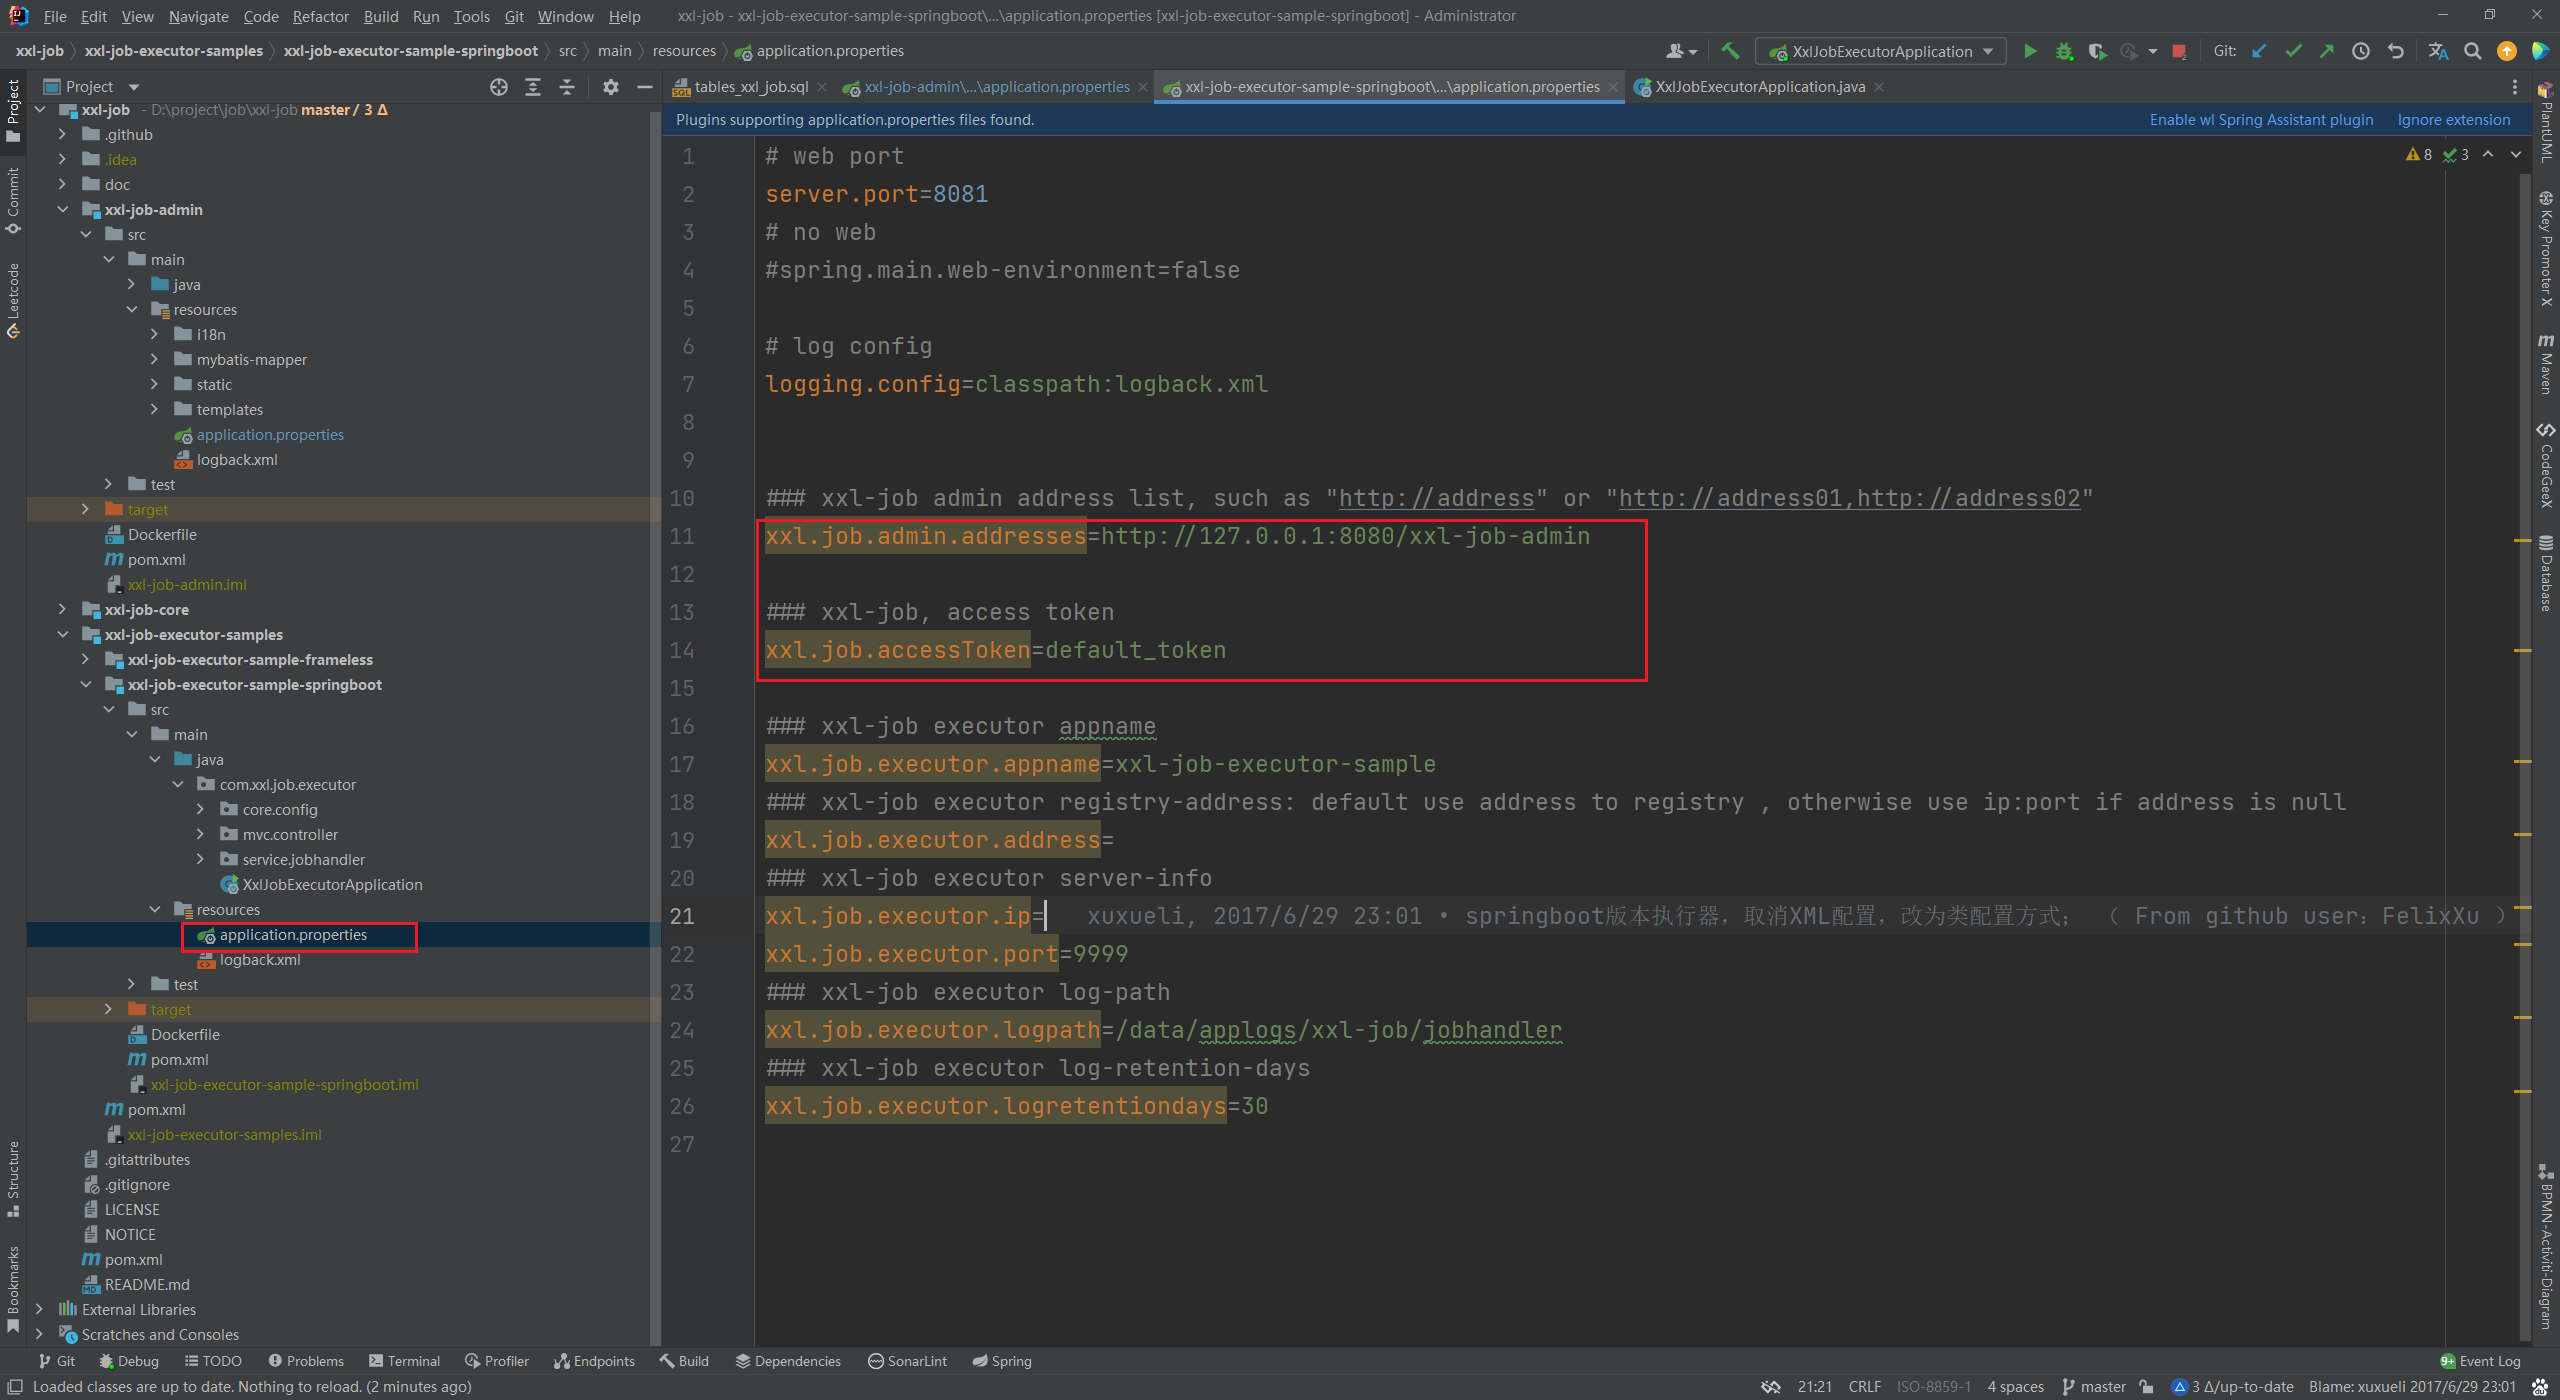
3、新增 XxlJobConfig 配置类,创建 XxlJobSpringExecutor 实例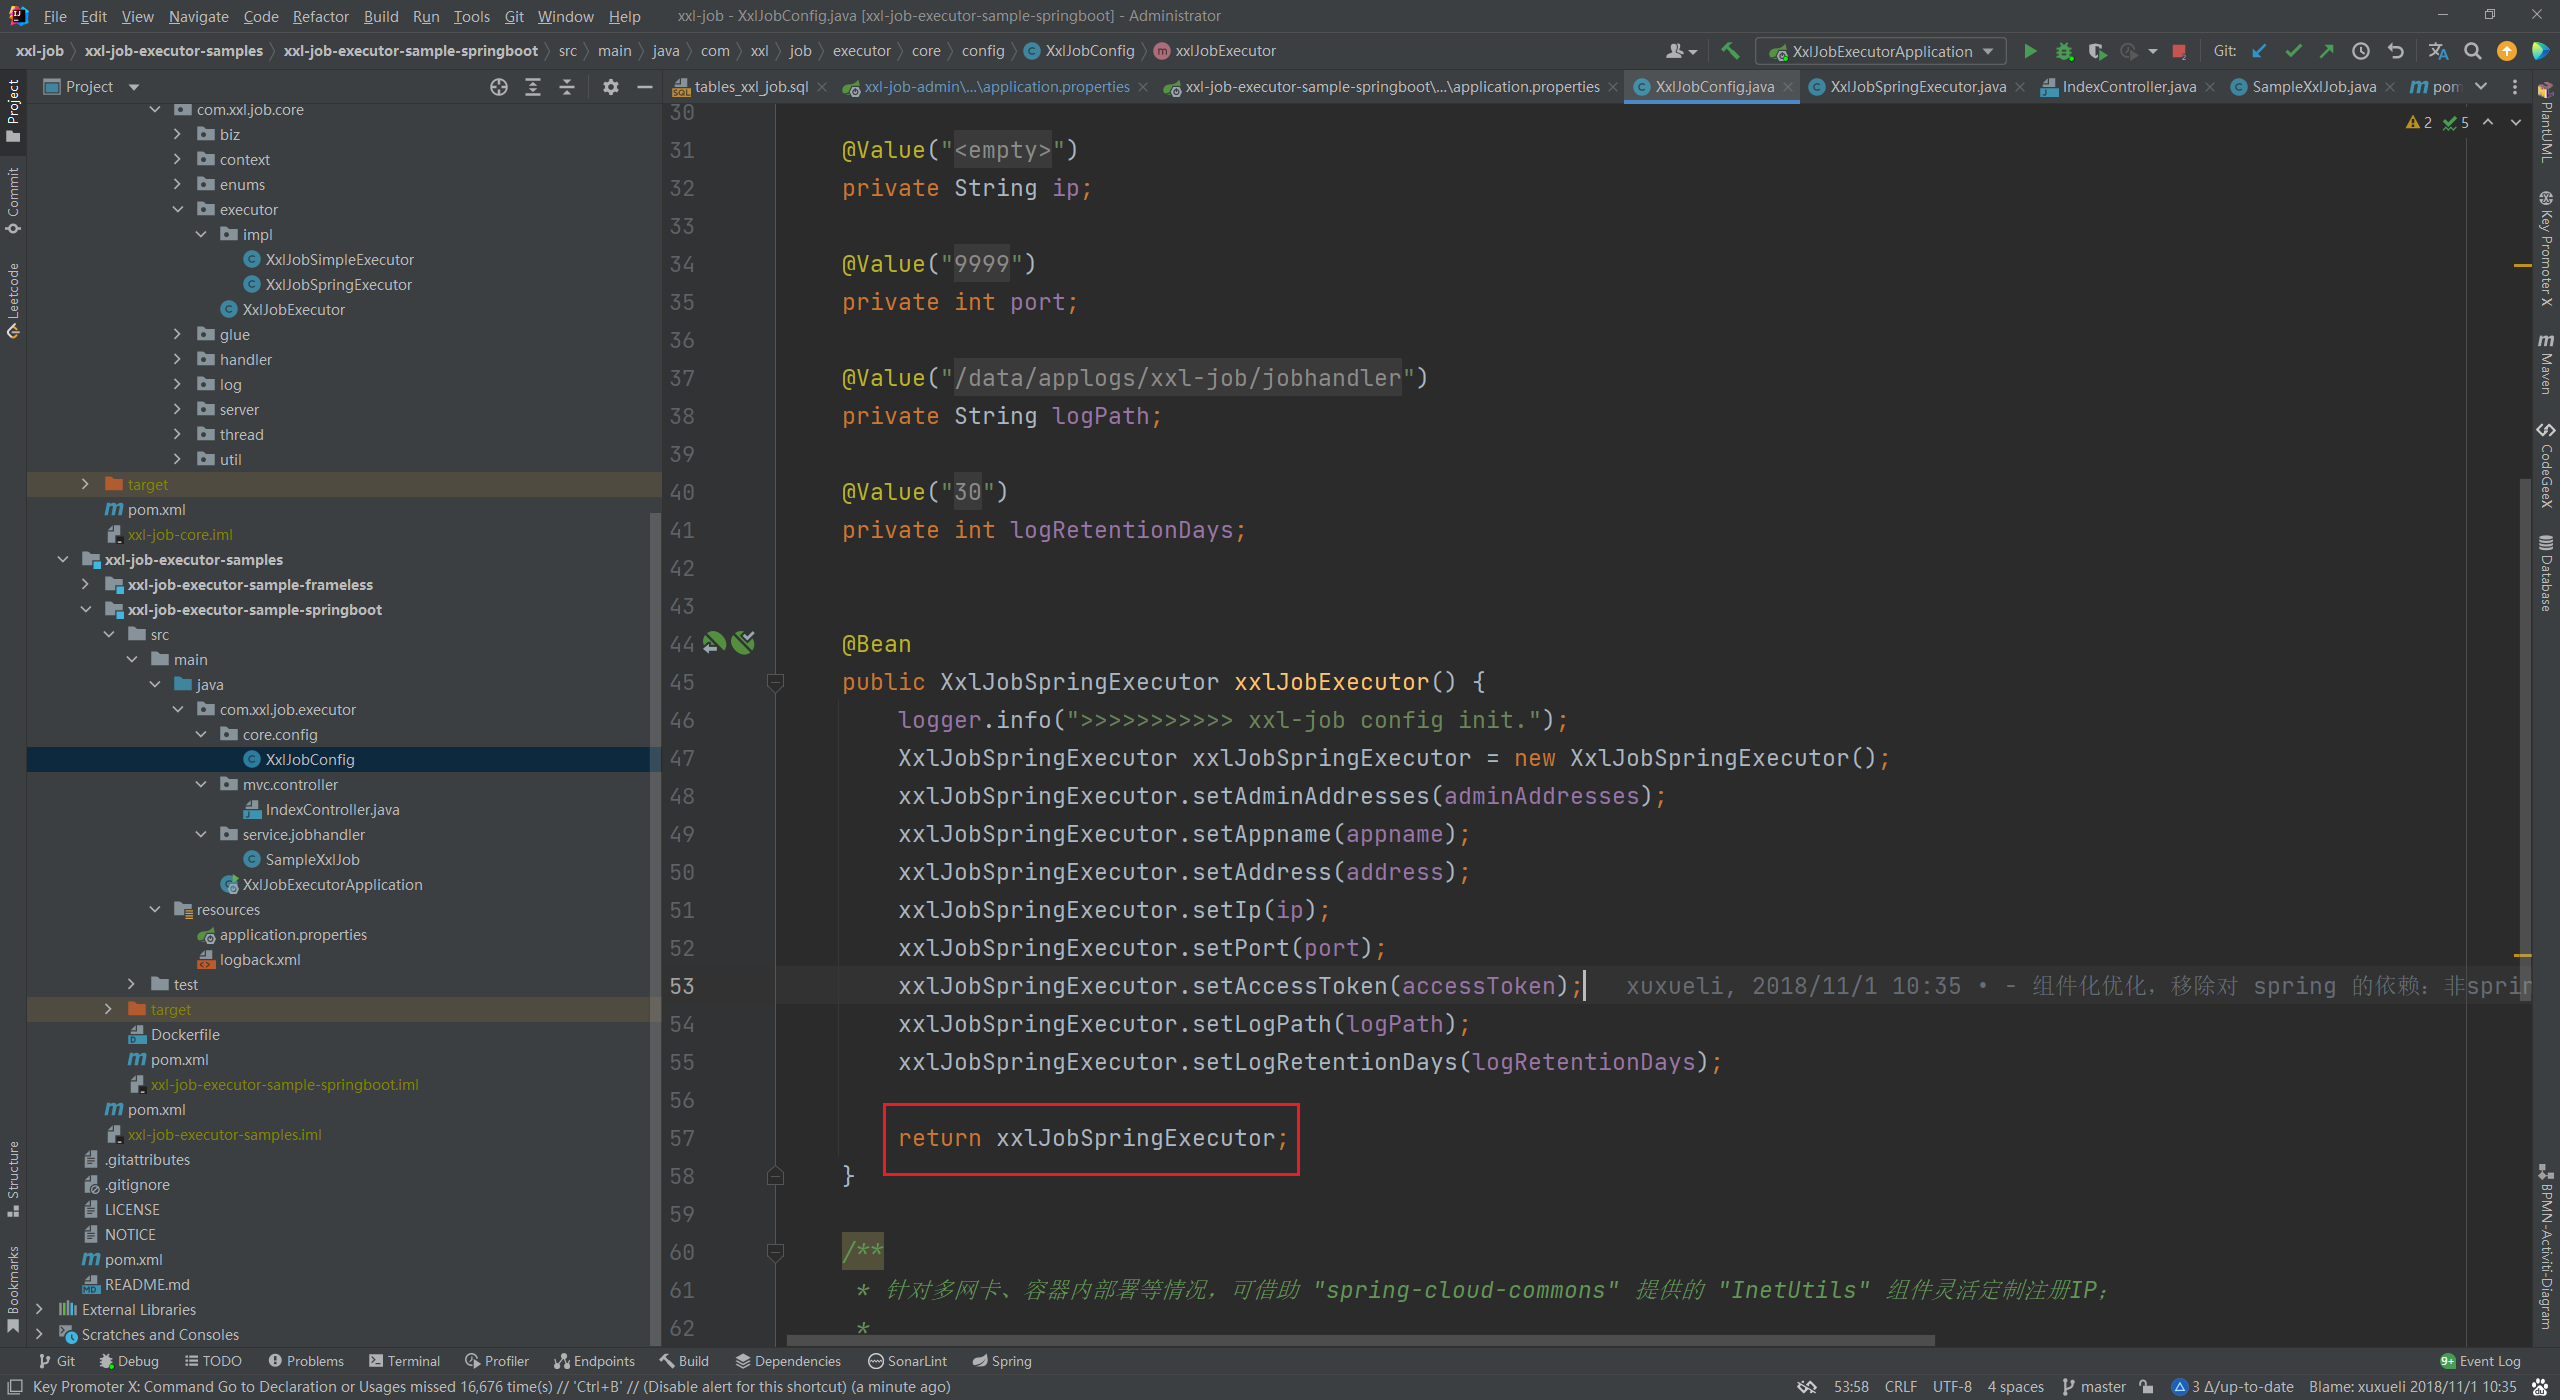
4、创建任务,在需要被调度的方法上新增 @XxlJob 注解即可被标识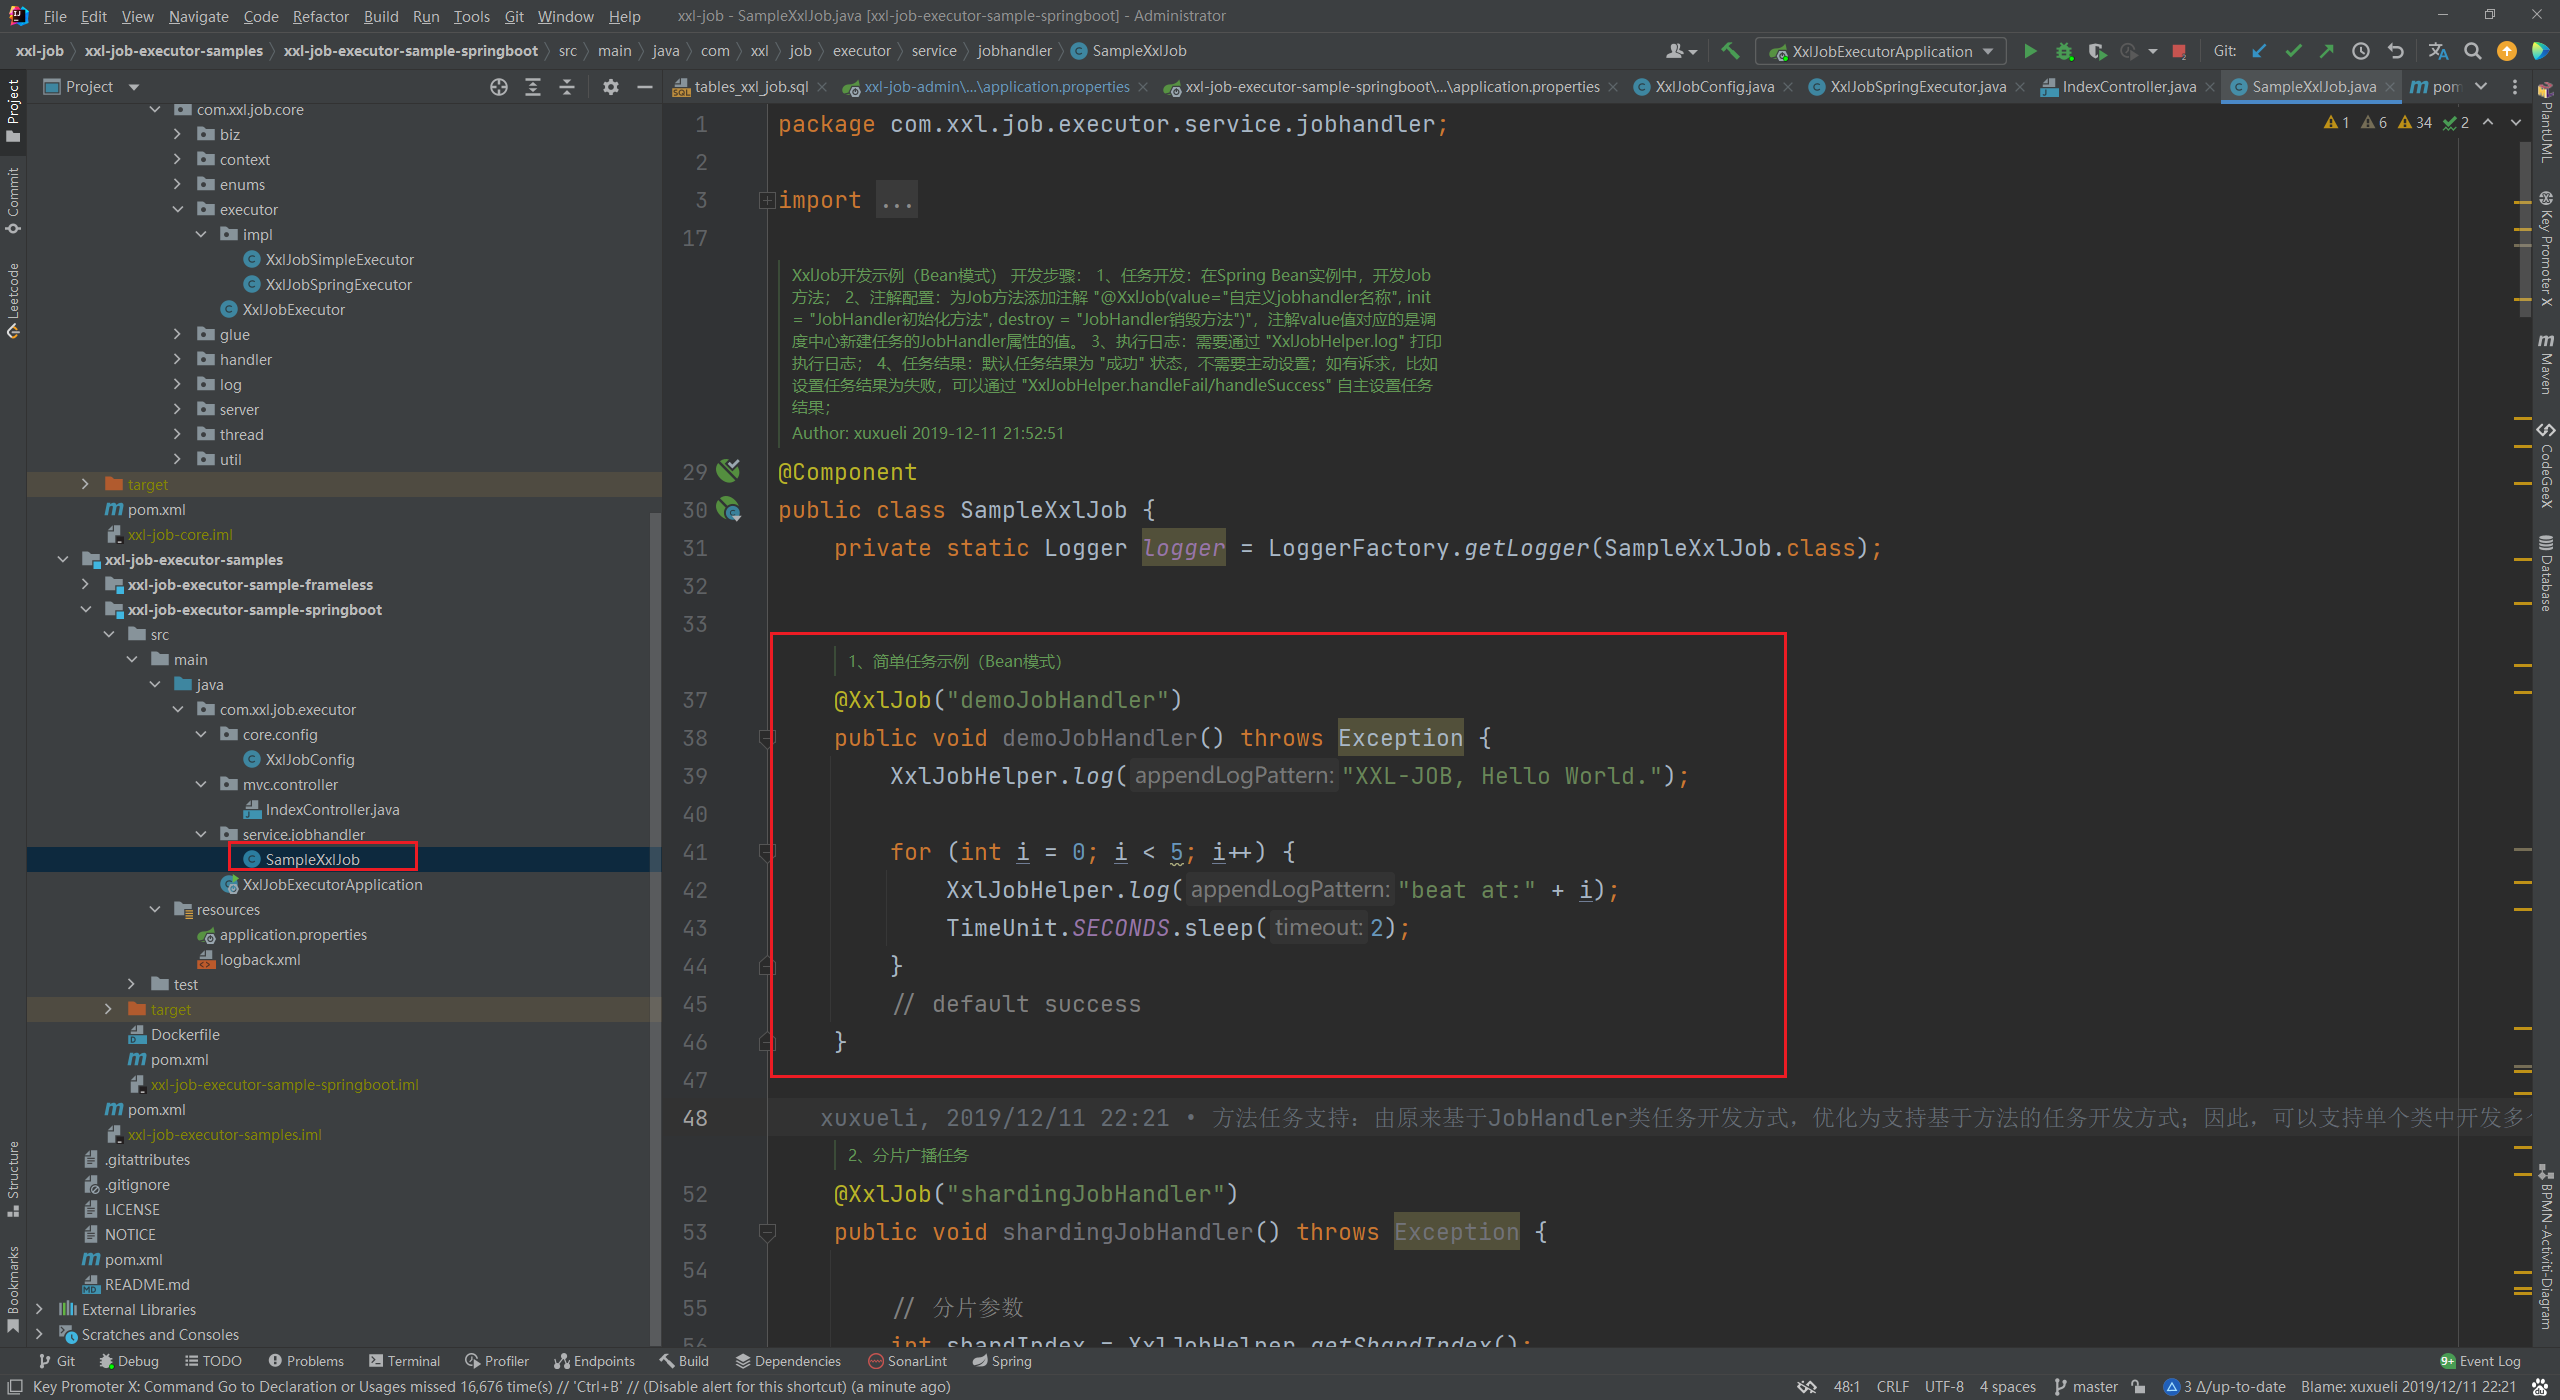
5、启动该执行器项目,即可在调度中心中查看到注册进来的调度器了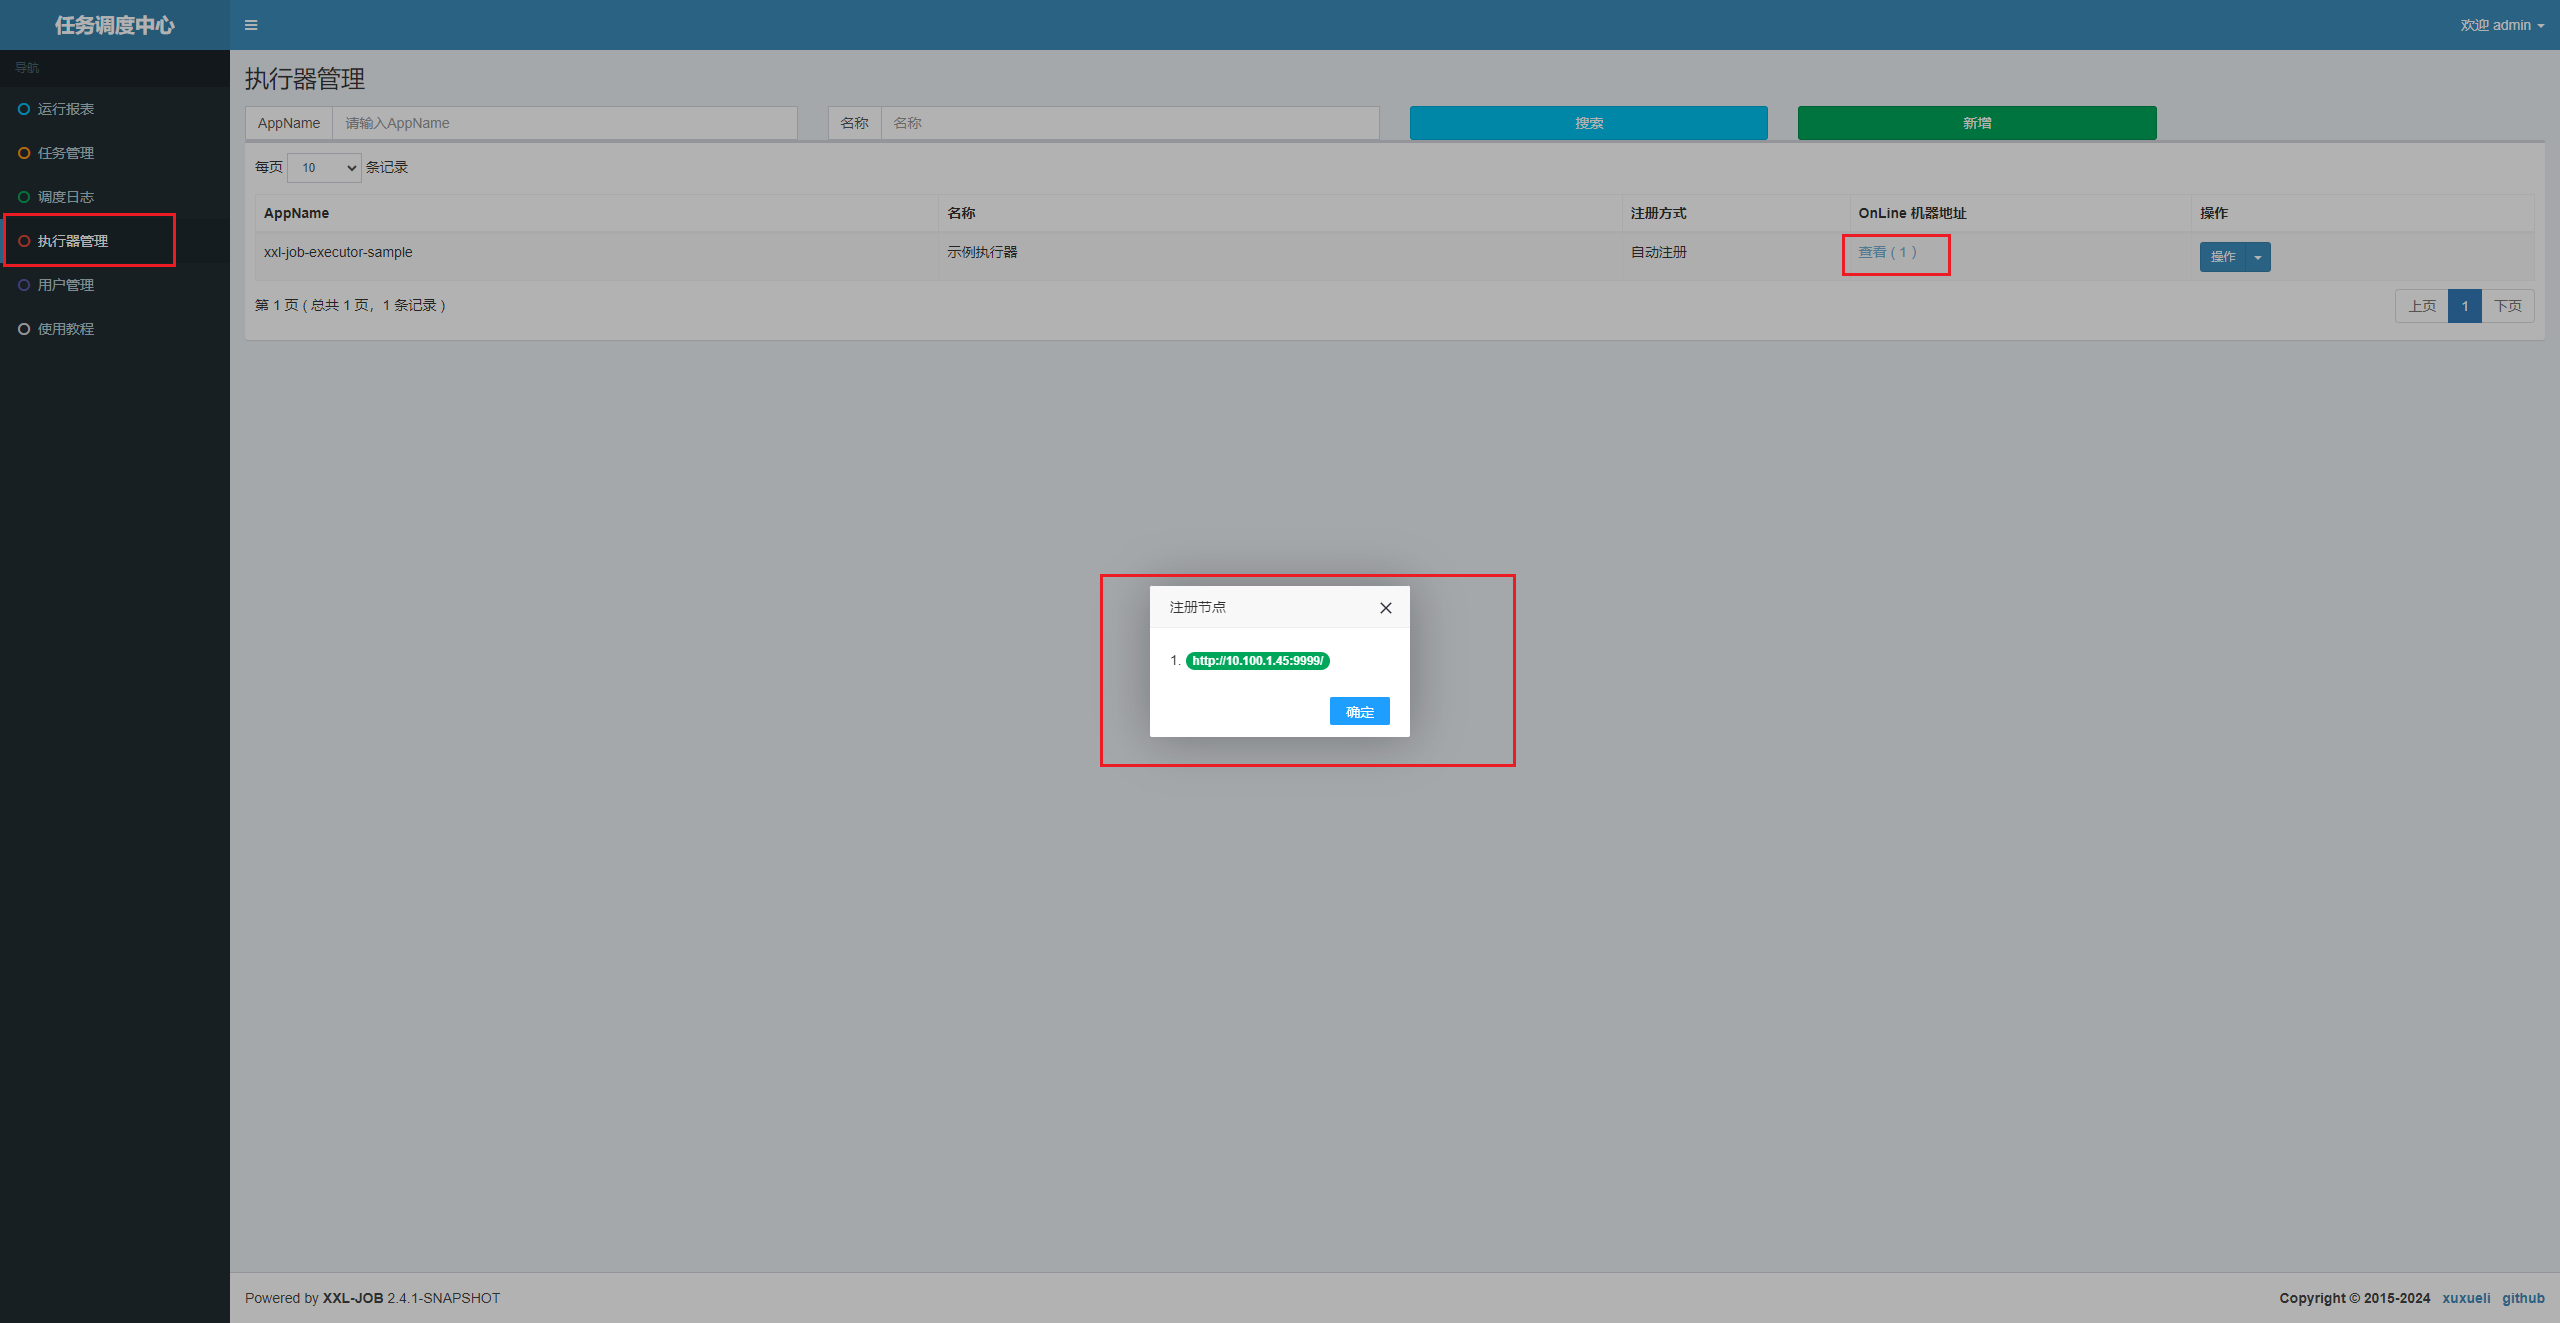
6、添加任务,指定执行器、cron、执行方法 即可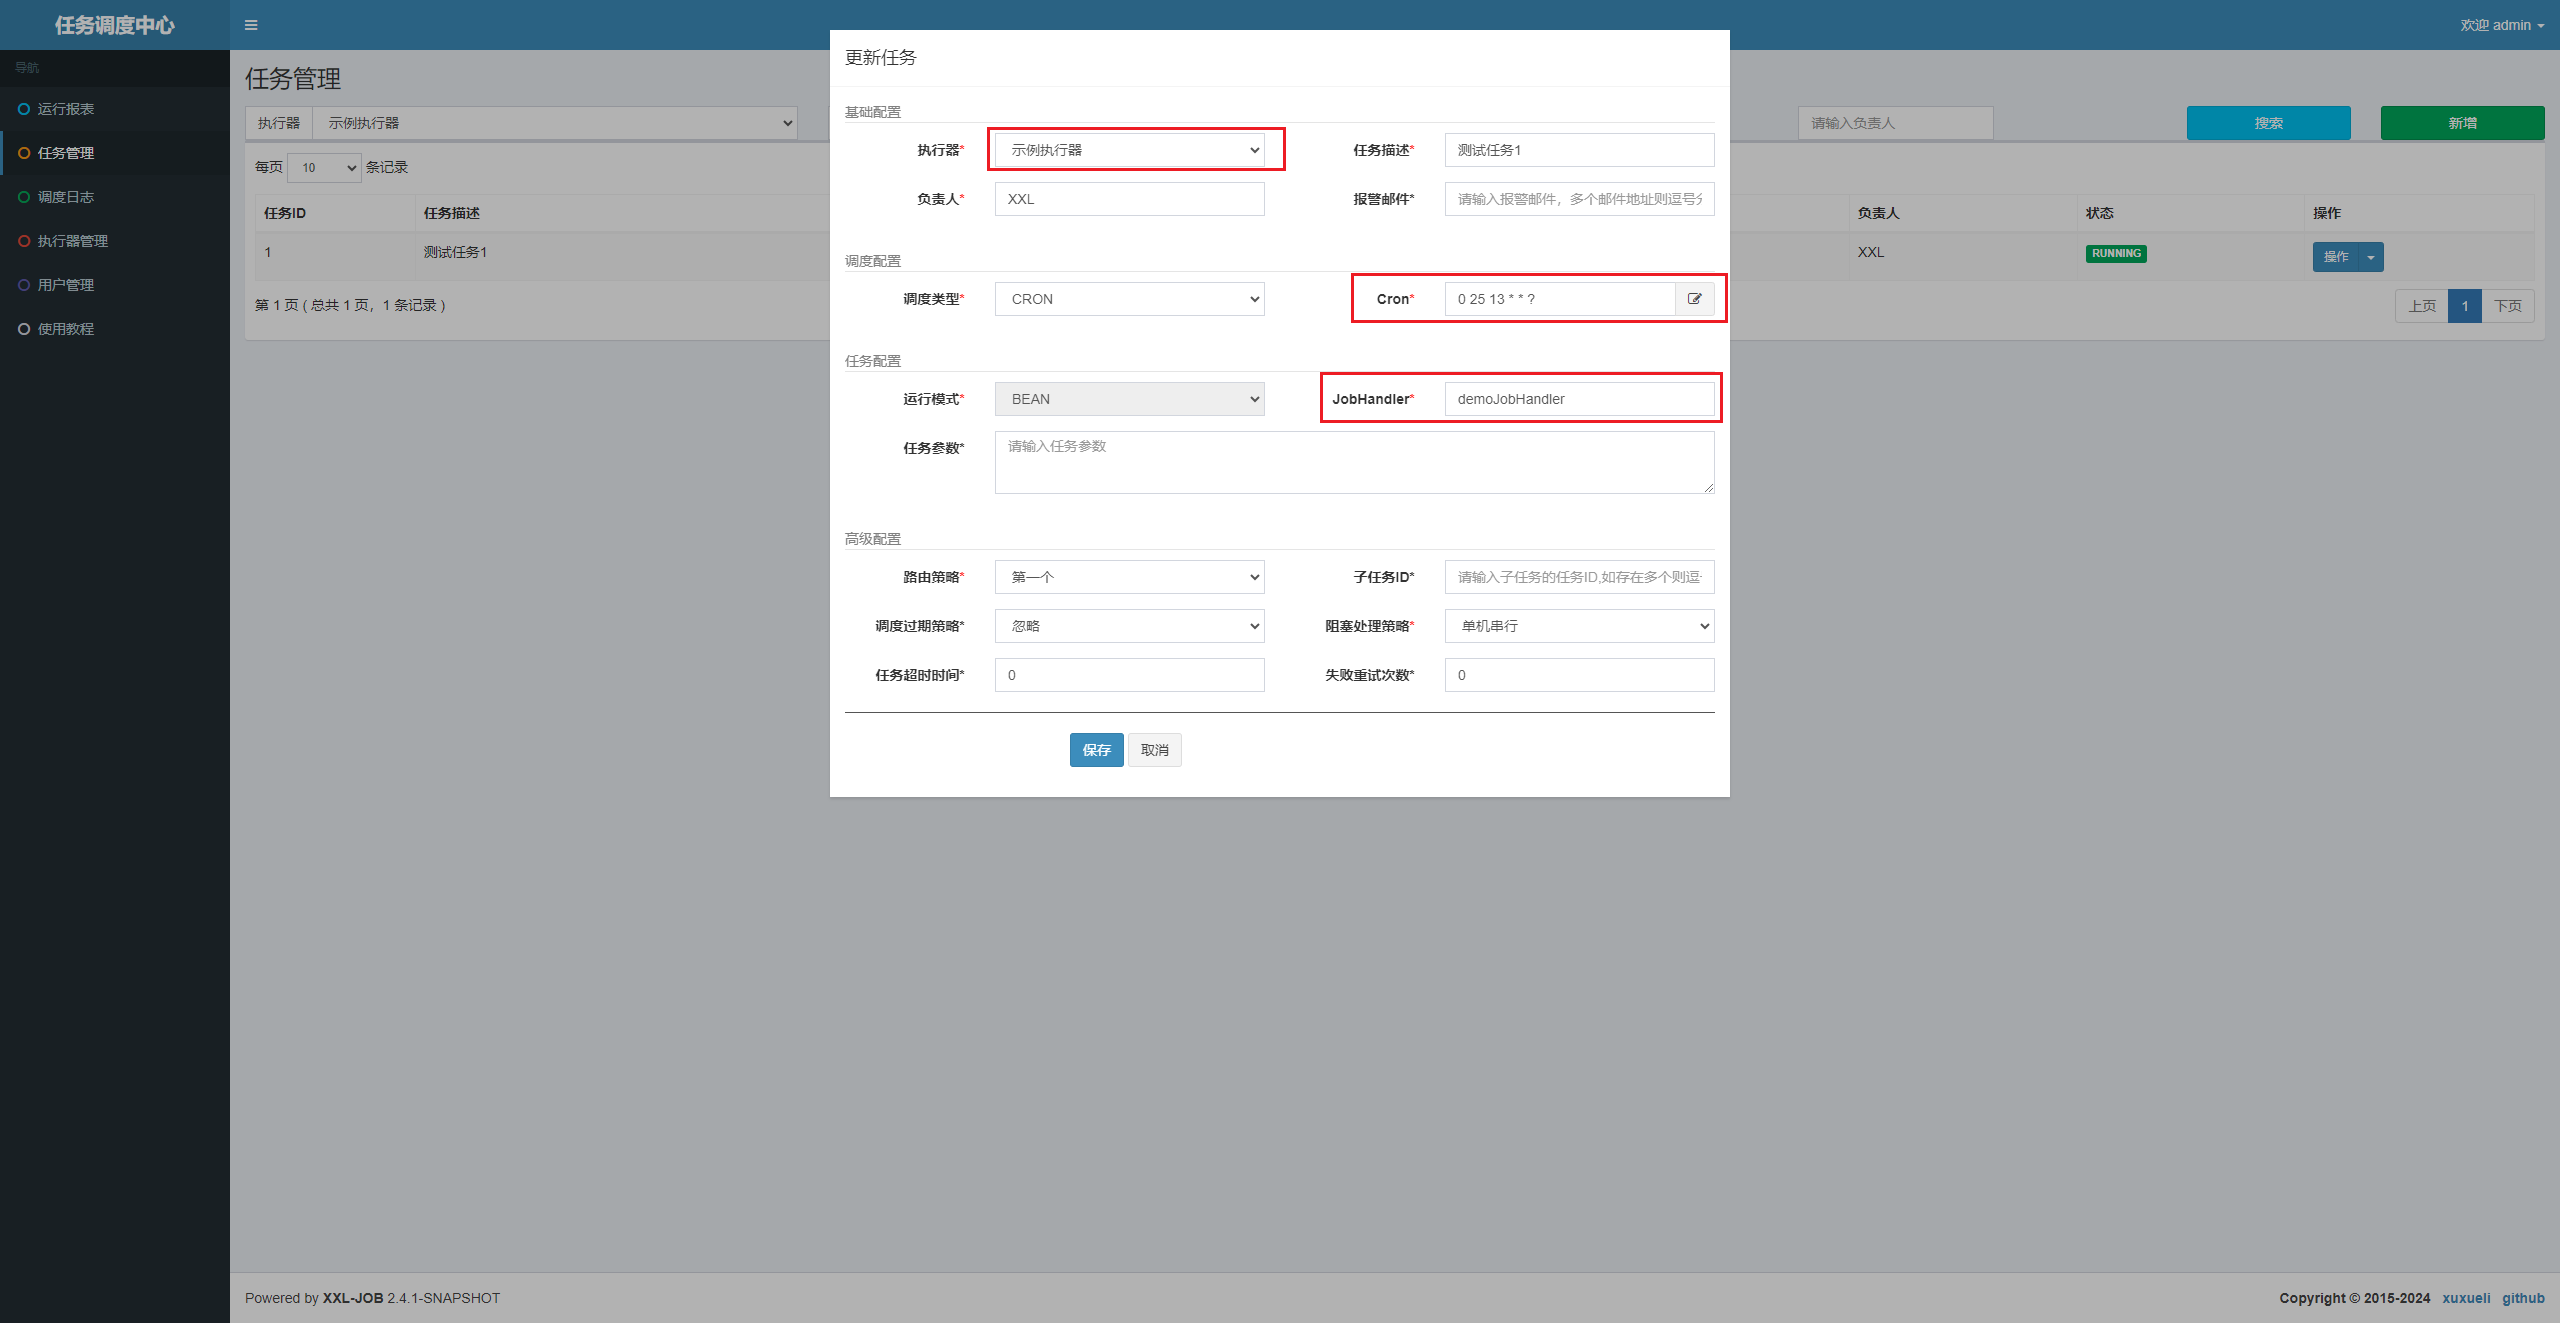
原理分析
xxl-job-admin
admin 中定义了对应的线程用于循环监听 job,其中 JobScheduleHelper 类中定义了一个线程用于循环监听 job 是否临近触发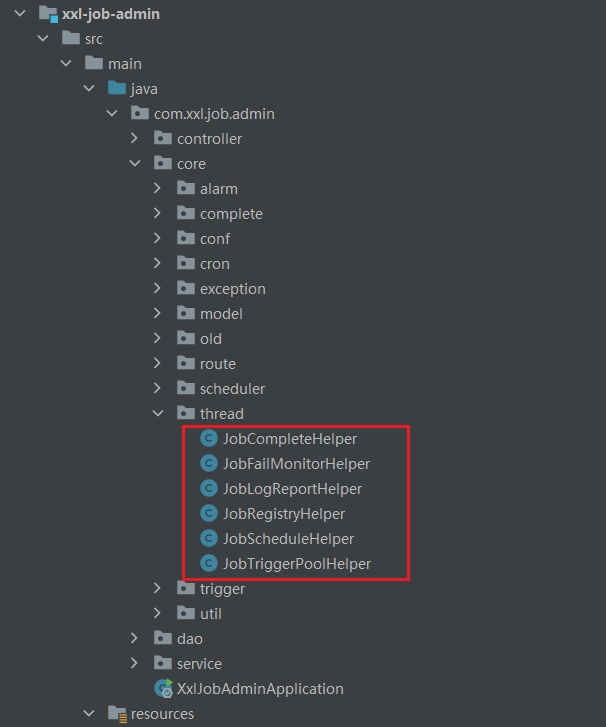
在 com/xxl/job/admin/core/thread/JobScheduleHelper.java:80 中循环读取近 5 秒内将触发的任务,然后依次处理并更新下一次执行时间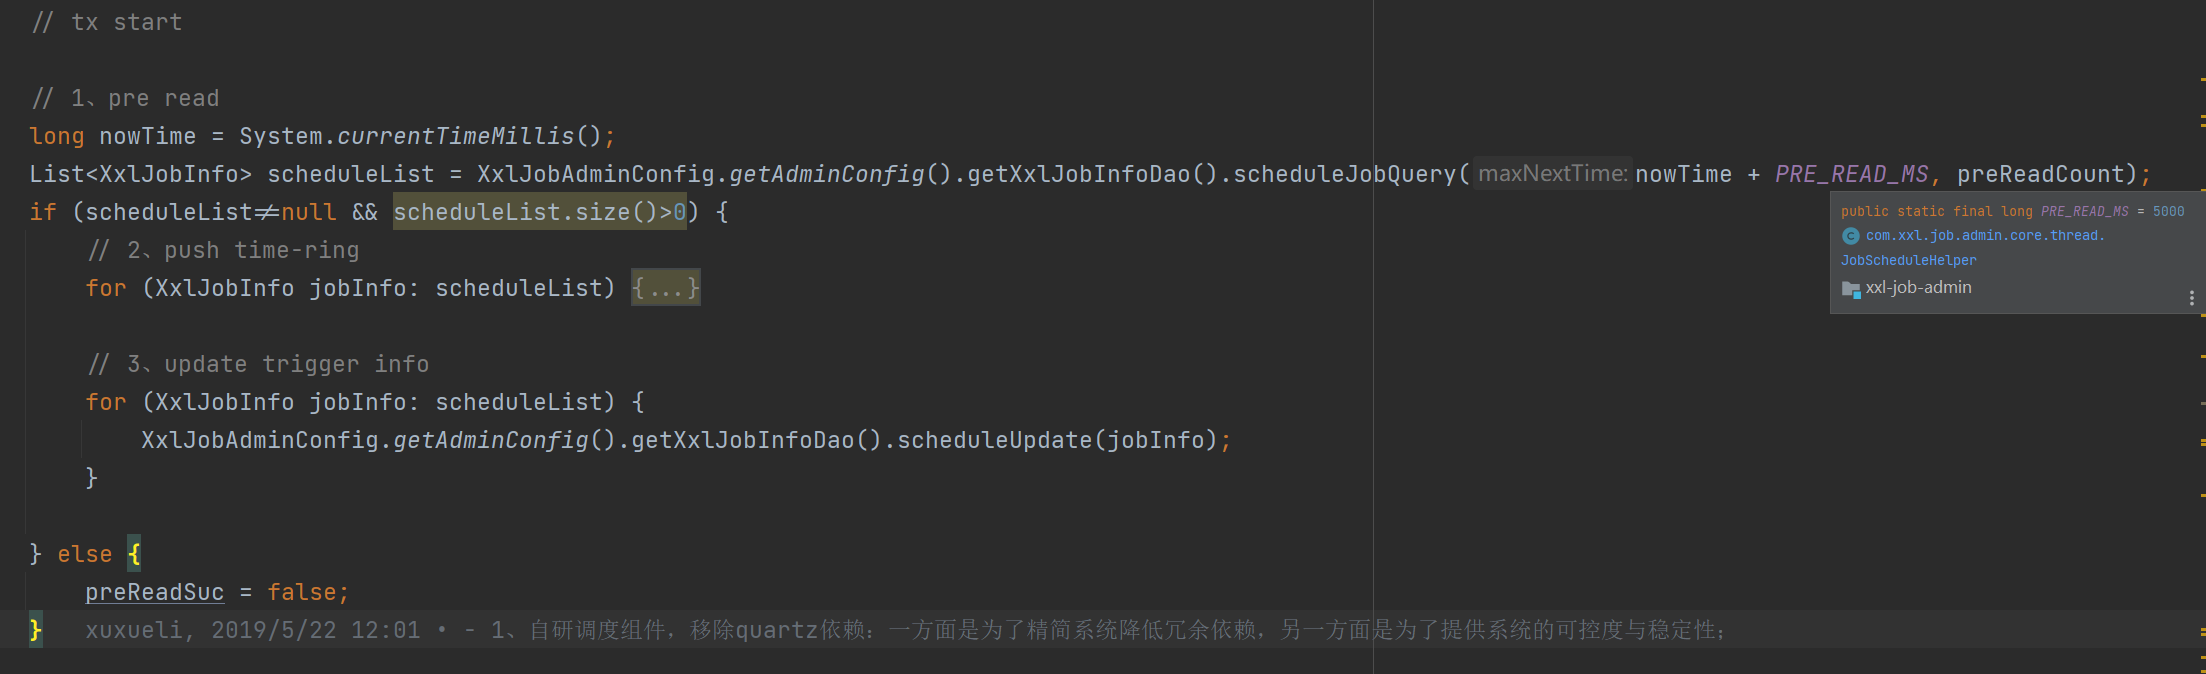
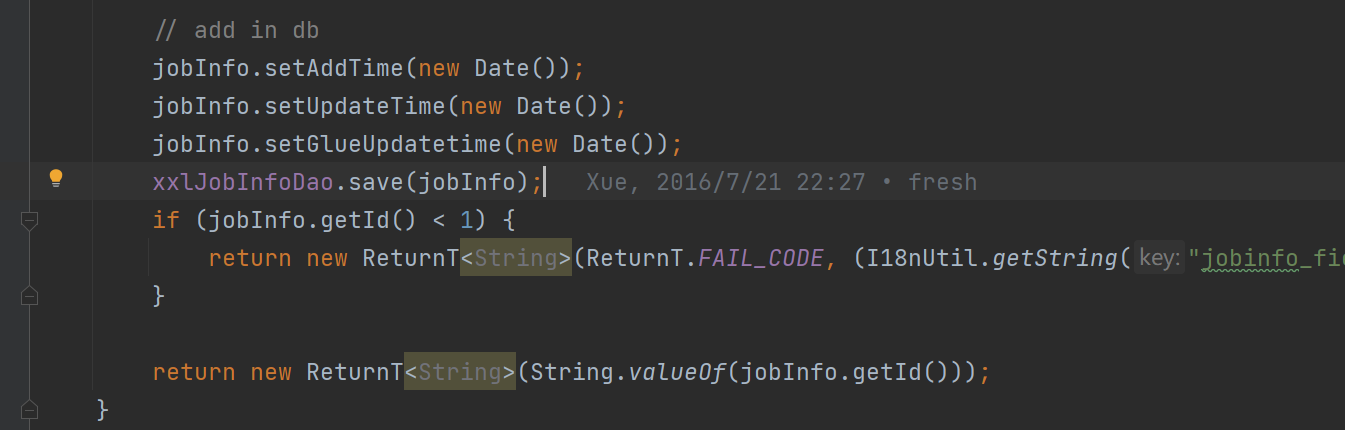
所以当我们在后台中新增任务的时候,其实也就是往数据库的 xxl_job_info 新增一条记录而已,这样就可以在 JobScheduleHelper 线程中读取到任务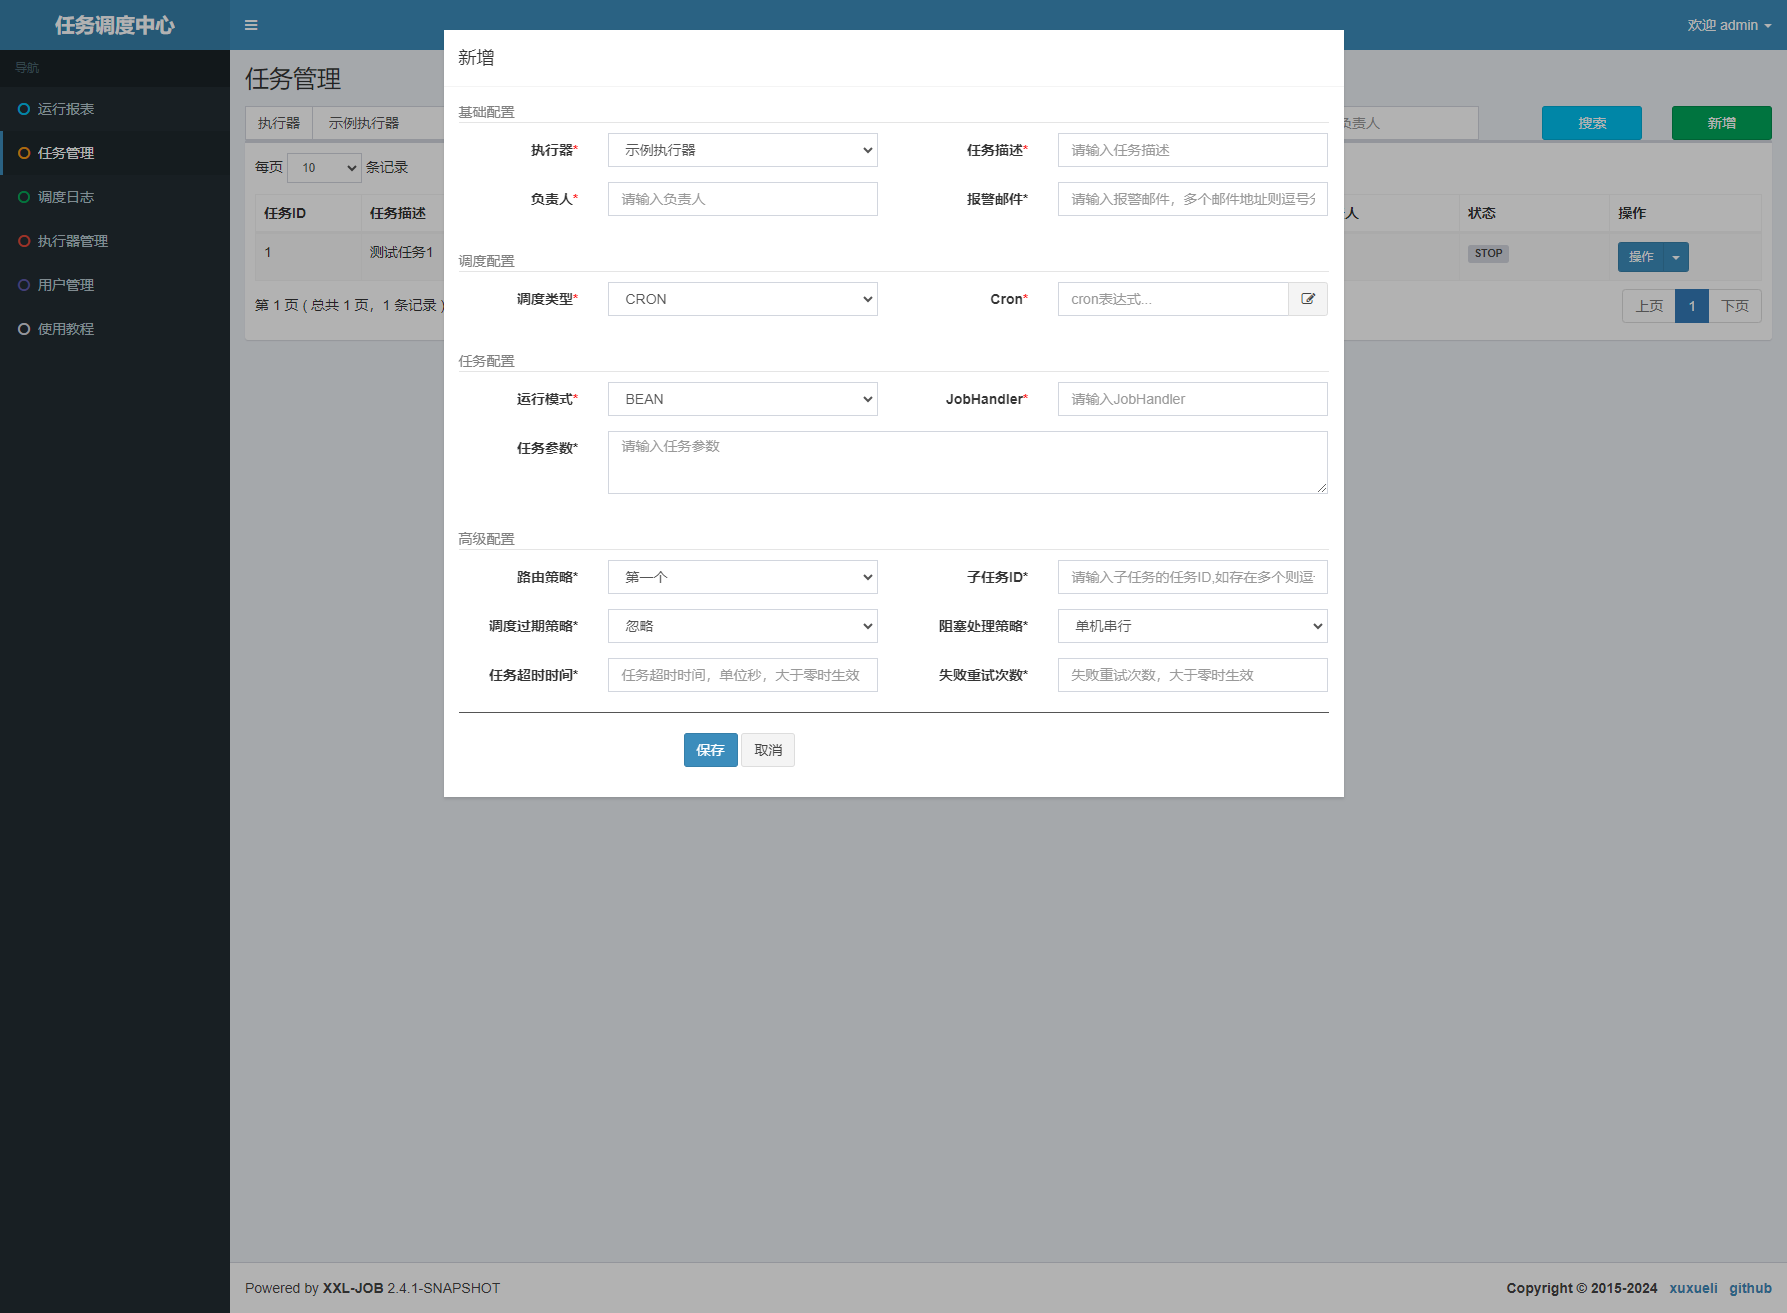
xxl-job-executor-sample-springboot
执行器注册流程
在 XxlJobConfig 配置类中定义了 xxlJobExecutor 这个 bean,所以在项目启动的过程中就会自动实例化一个 XxlJobSpringExecutor 对象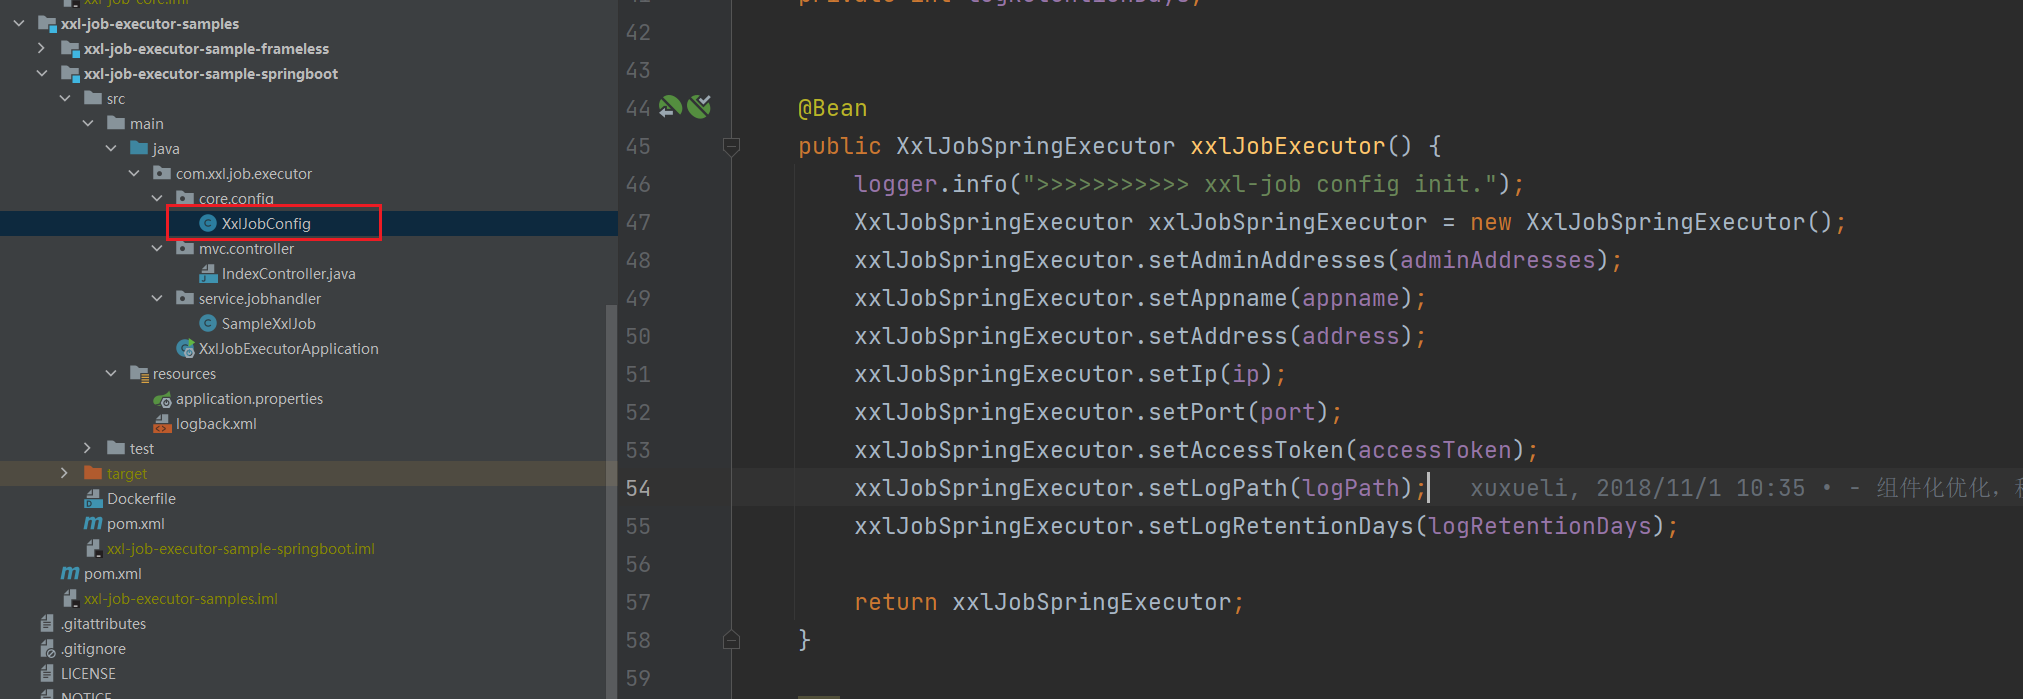
而在 XxlJobSpringExecutor 实例化过程中则会调用两个初始化方法: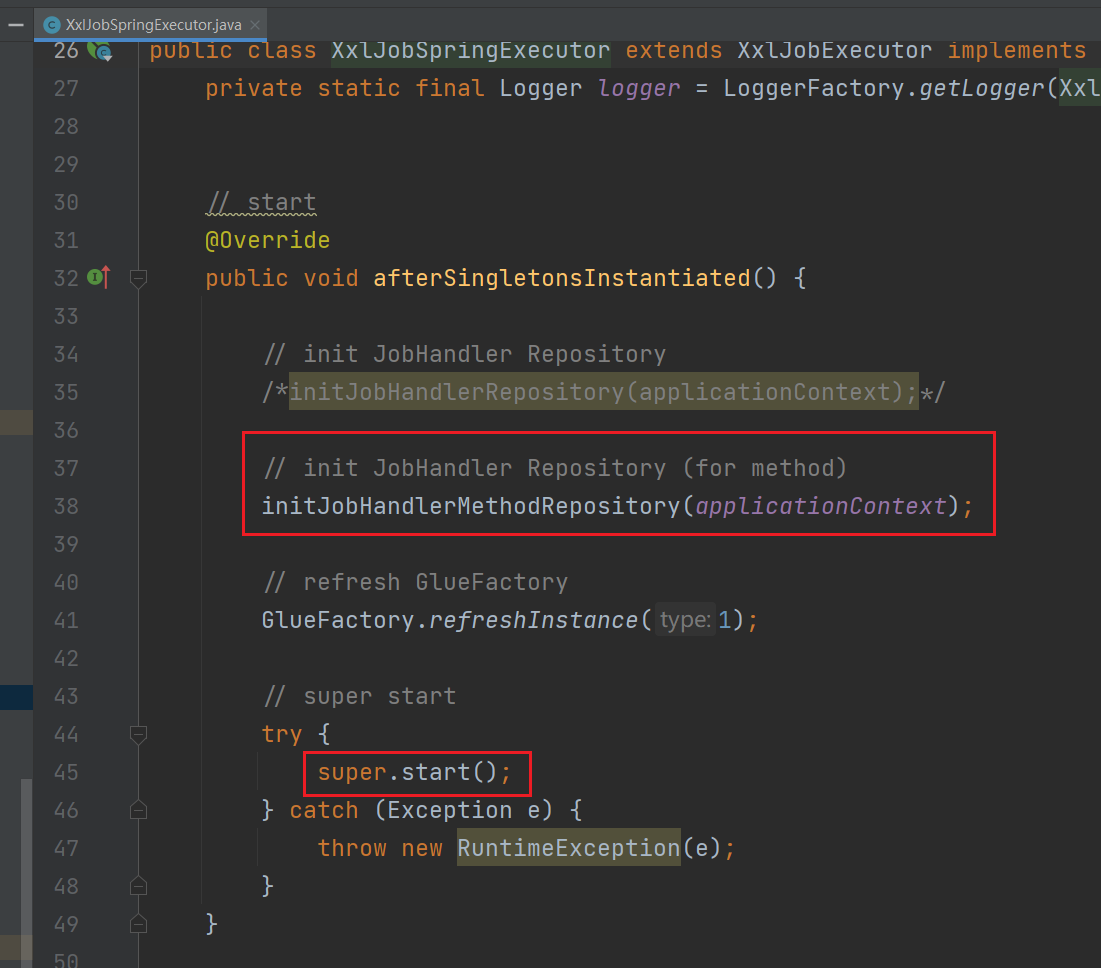
XxlJobSpringExecutor:用于读取所有包含 XxlJob 注解的方法,并添加到 jobHandlerRepository 这个 map 中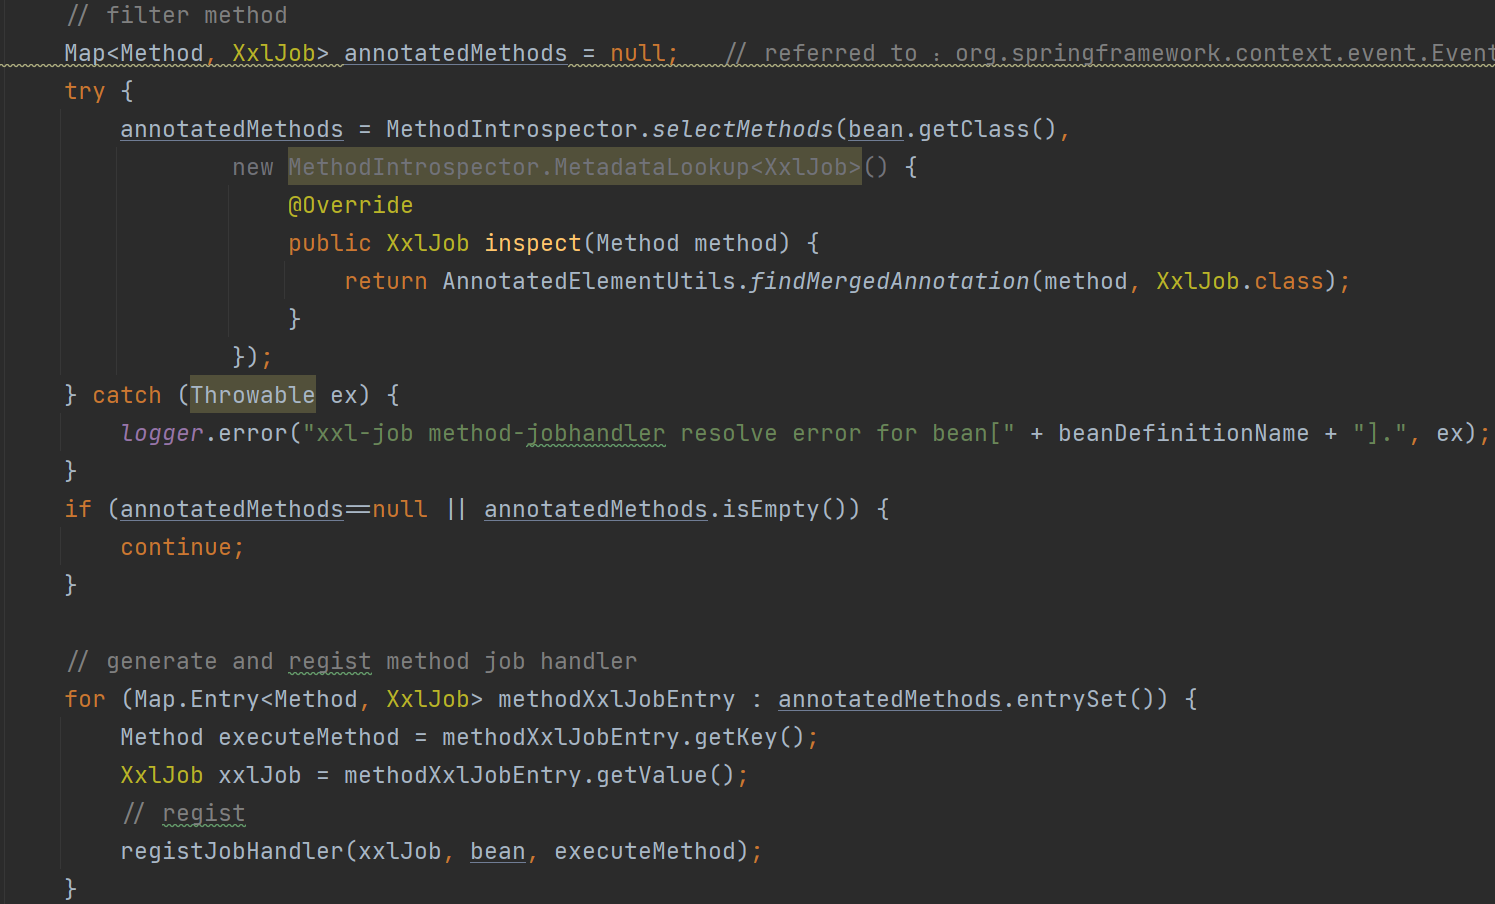
start:调用父类 XxlJobExecutor 的方法,用于注册执行器,配置 netty 的地址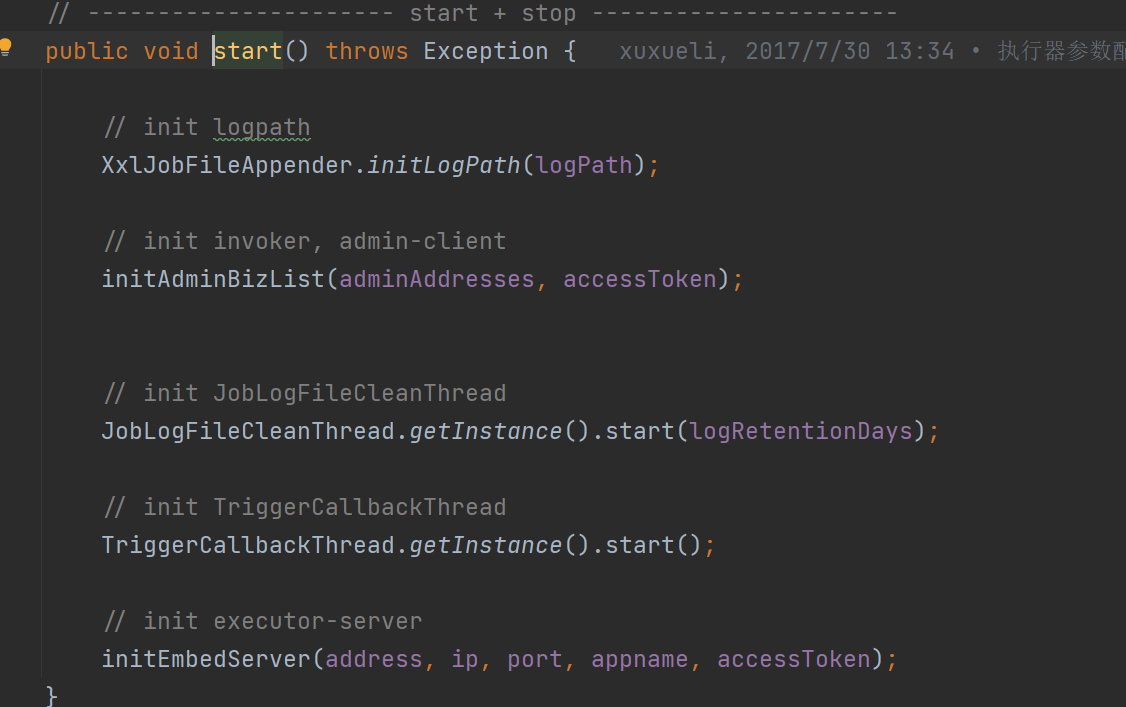
任务触发过程
1、在 com/xxl/job/admin/core/thread/JobScheduleHelper.java:80 代码中读取到任务之后,会对任务触发时间进行判断,然后采用不同的触发方式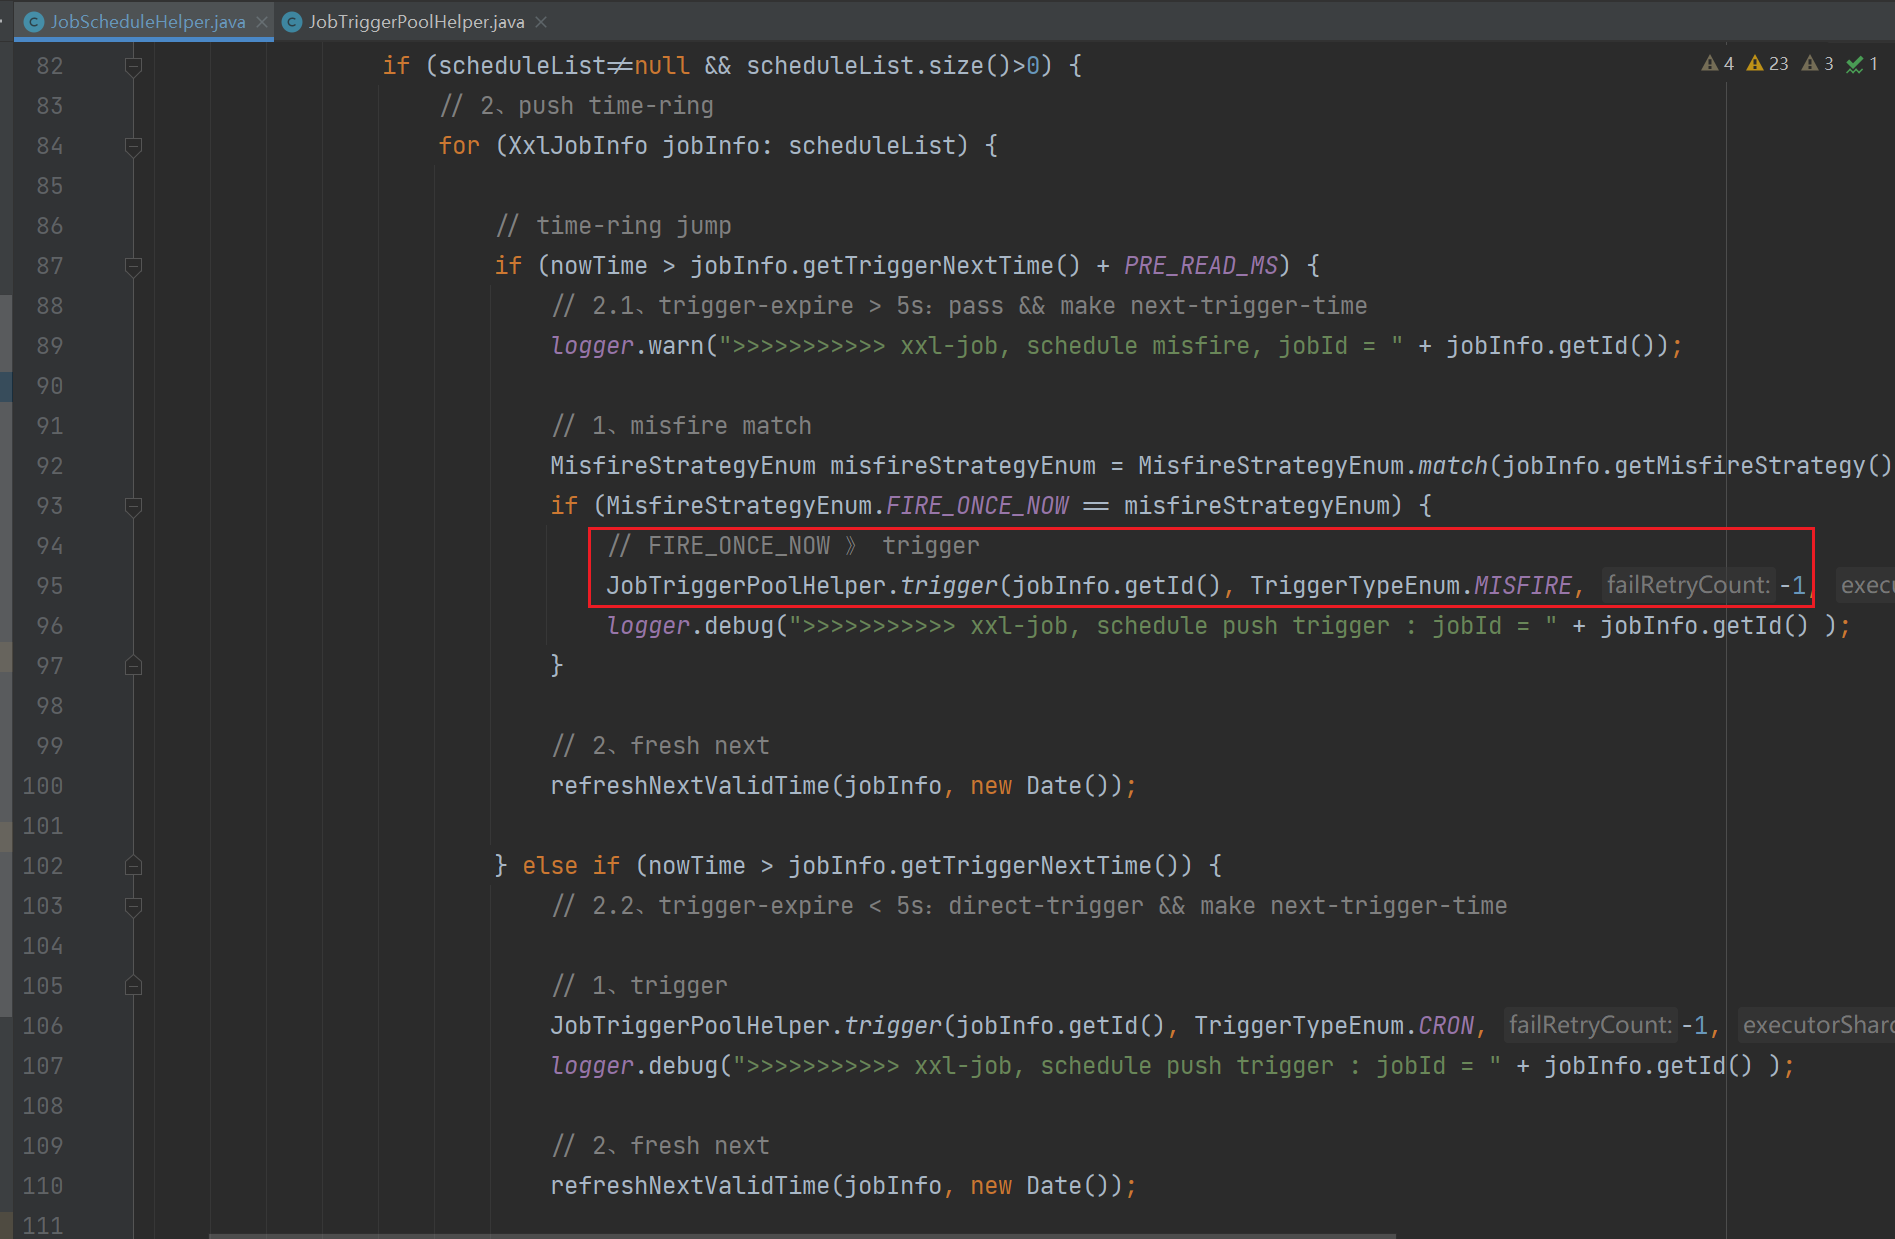
2、而触发的任务是交给了 JobTriggerPoolHelper 线程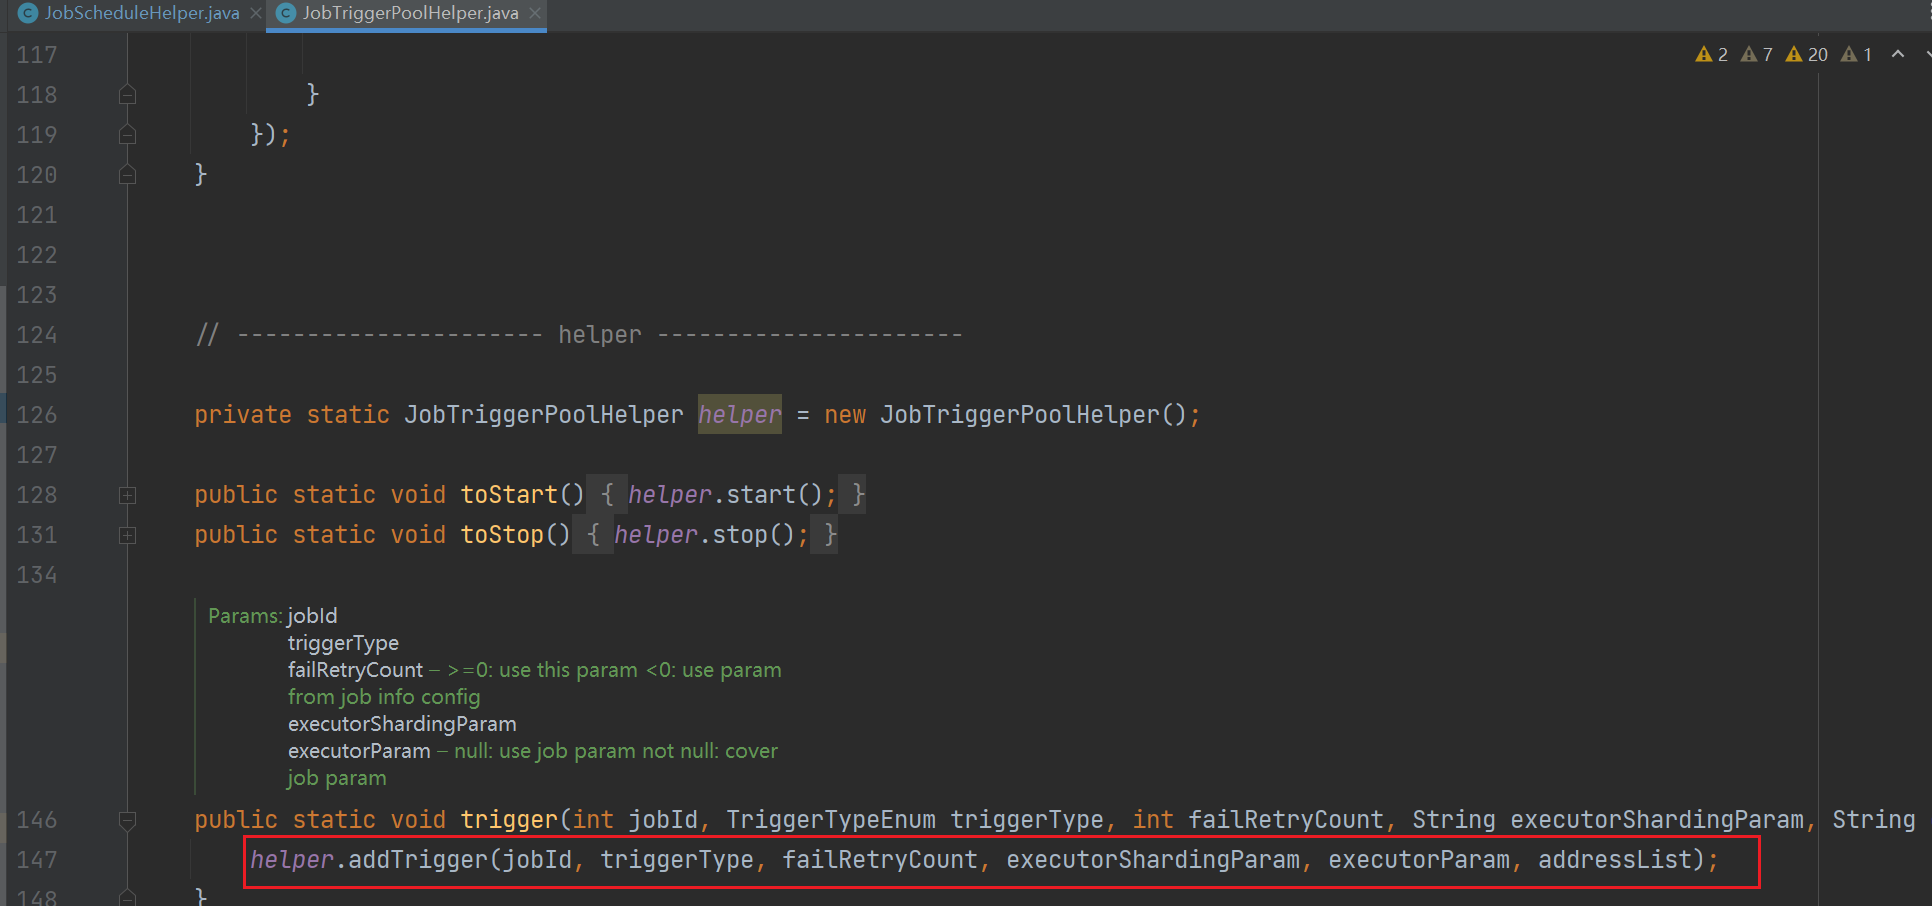
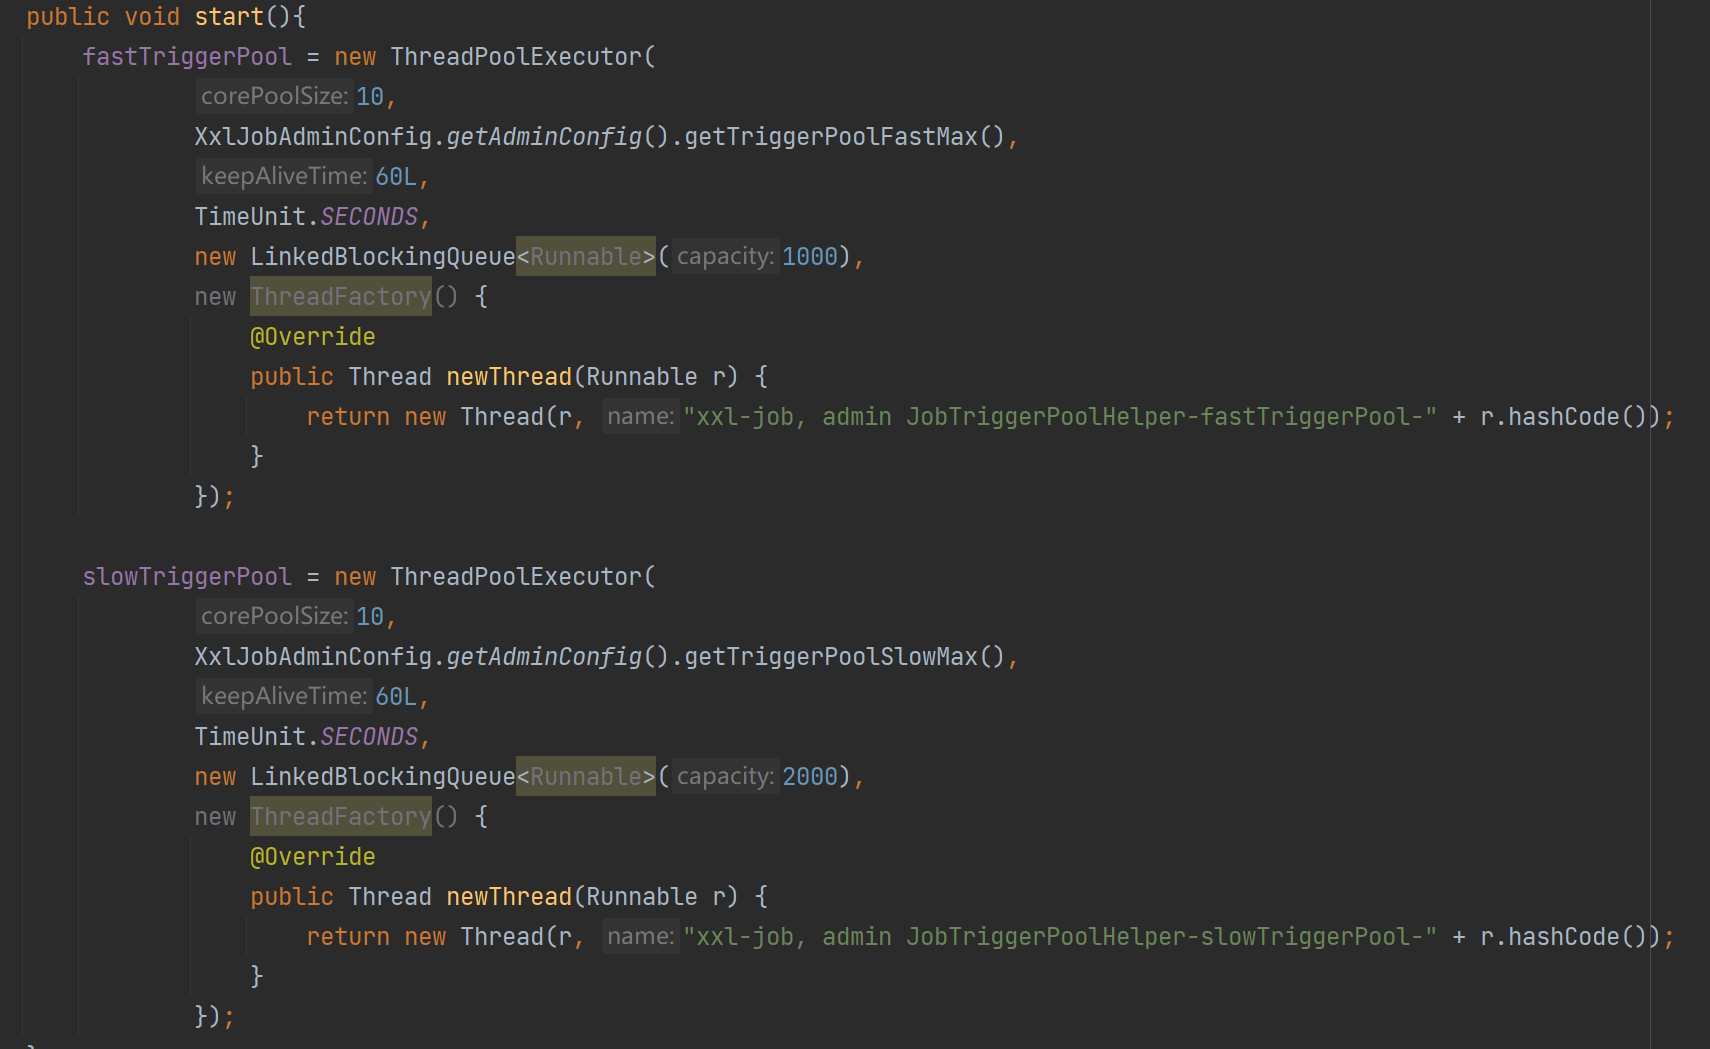
3、在 JobTriggerPoolHelper 添加触发任务的时候会根据任务的执行时间判断使用哪个线程池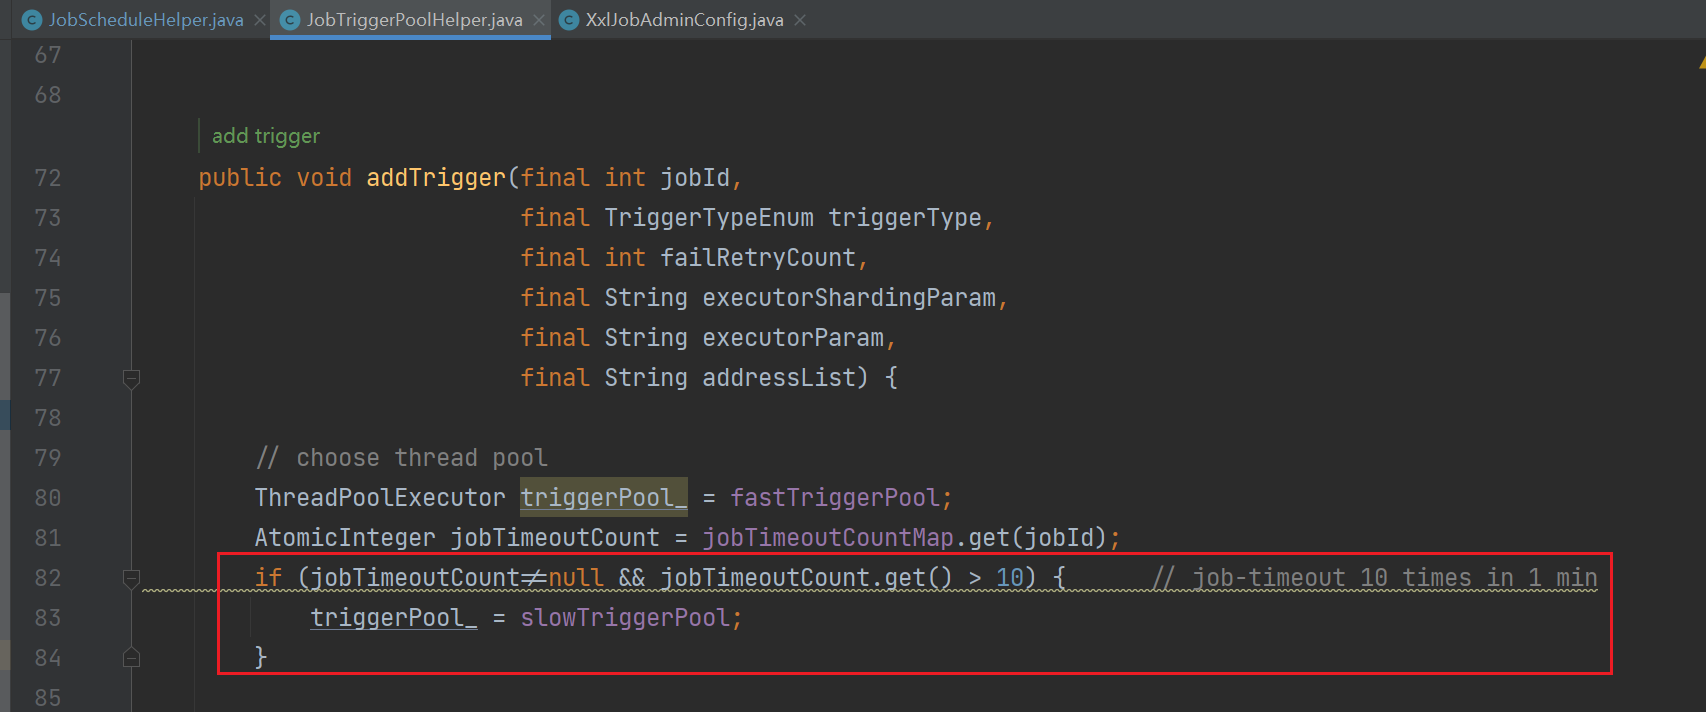
这里定义了 fastTriggerPool 和 slowTriggerPool,两个线程的主要不同是 最大线程数量 和 等待队列大小
- slowTriggerPool:一分钟内,超过 10 运行时间大于 500 毫秒就属于 slowTriggerPool,拥有更大的 线程数量 和 等待队列
- 本文链接:https://lxjblog.gitee.io/2024/04/12/%E4%BB%BB%E5%8A%A1%E8%B0%83%E5%BA%A6/
- 版权声明:本博客所有文章除特别声明外,均默认采用 许可协议。