Hash 算法
通过与自身的 hash 值右移 16 位异或,减少哈希冲突
static final int hash(Object key) {
    int h;
    return (key == null) ? 0 : (h = key.hashCode()) ^ (h >>> 16);
}
String 类型的 hashCode() 计算方式如下:
s[0]*31^(n-1) + s[1]*31^(n-2) + … + s[n-1]
public int hashCode() {
    int h = hash;
    if (h == 0 && value.length > 0) {
        char val[] = value;

        for (int i = 0; i < value.length; i++) {
            h = 31 * h + val[i];
        }
        hash = h;
    }
    return h;
}
请注意,每当重写hashCode方法时,通常都需要重写该方法,以便维护hashCode方法的通用约定,该约定规定相等的对象必须具有相等的哈希代码
而当我们使用 lombok 的 @EqualsAndHashCode 注解时,生成的 hashCode() 方法如下:
计算方法类似于:s[0]*59^(n-1) + s[1]*59^(n-2) + … + s[n-1],n 为元素个数,s 为各个属性的 hash 值
public int hashCode() {
    int PRIME = true;
    int result = 1;
    Object $name = this.getName();
    int result = result * 59 + ($name == null ? 43 : $name.hashCode());
    Object $sex = this.getSex();
    result = result * 59 + ($sex == null ? 43 : $sex.hashCode());
    Object $mobile = this.getMobile();
    result = result * 59 + ($mobile == null ? 43 : $mobile.hashCode());
    Object $contactNo = this.getContactNo();
    result = result * 59 + ($contactNo == null ? 43 : $contactNo.hashCode());
    Object $certCategory = this.getCertCategory();
    result = result * 59 + ($certCategory == null ? 43 : $certCategory.hashCode());
    Object $certCode = this.getCertCode();
    result = result * 59 + ($certCode == null ? 43 : $certCode.hashCode());
    Object $uid = this.getUid();
    result = result * 59 + ($uid == null ? 43 : $uid.hashCode());
    Object $address = this.getAddress();
    result = result * 59 + ($address == null ? 43 : $address.hashCode());
    return result;
}
初始化容量
初始化容量为 16,并且容量固定为 2 的次方,扩容是也是直接乘 2
/**
 * 初始化容量
 */
static final int DEFAULT_INITIAL_CAPACITY = 1 << 4; // aka 16

/**
 * 最大容量
 */
static final int MAXIMUM_CAPACITY = 1 << 30;

/**
 * 负载因子,用于和容量相乘,计算扩容阈值
 */
static final float DEFAULT_LOAD_FACTOR = 0.75f;
hashMap 容量和 负载因子 是可以在构造方法中指定的
public HashMap(int initialCapacity, float loadFactor) {
    if (initialCapacity < 0)
        throw new IllegalArgumentException("Illegal initial capacity: " +
                                           initialCapacity);
    if (initialCapacity > MAXIMUM_CAPACITY)
        initialCapacity = MAXIMUM_CAPACITY;
    if (loadFactor <= 0 || Float.isNaN(loadFactor))
        throw new IllegalArgumentException("Illegal load factor: " +
                                           loadFactor);
    this.loadFactor = loadFactor;
    this.threshold = tableSizeFor(initialCapacity);
}
其中 tableSizeFor 方法就可以根据输入的容量大小,计算出合适的容量,即 大于且最接近 输入值的容量大小(例如输入12时,容量会变成 16)
static final int tableSizeFor(int cap) {
    // 将容量 -1,为了获取最接近当前容量
    int n = cap - 1;
    // 与自身右移 1 位相与,确保最高两位为 1
    n |= n >>> 1;
    // 因为最高 2 位是 1,所以可以右移 2 位再相与,则最高 4 位都为 1
    n |= n >>> 2;
    n |= n >>> 4;
    n |= n >>> 8;
    // int 类型最多为 32 位,所以此时可以确保最接近容量的二进制位都是 1
    n |= n >>> 16;
    // 将 n + 1,即可取得最接近输入值的 2 次方容量
    return (n < 0) ? 1 : (n >= MAXIMUM_CAPACITY) ? MAXIMUM_CAPACITY : n + 1;
}
寻址方法
hashMap 通过计算 key 的 hash 值,然后与容量取余,找到对应的数组索引位置,遍历链表进行查值
public V get(Object key) {
    Node<K,V> e;
    return (e = getNode(hash(key), key)) == null ? null : e.value;
}
而在实际的代码中,是通过 (n - 1) & hash 计算索引位置,因为容量 n 是 2 的次方,所以 n -1 的二进制表示中全为 1,此时进行与运算的结果相当于对 n 进行取余
final Node<K,V> getNode(int hash, Object key) {
    Node<K,V>[] tab; Node<K,V> first, e; int n; K k;
    if ((tab = table) != null && (n = tab.length) > 0 &&

        // 通过 (n - 1) & hash 计算下标,获取链表头
        (first = tab[(n - 1) & hash]) != null) {

        // 当 hash 值相同且 key 相同时,返回对应的值
        if (first.hash == hash && // always check first node
            ((k = first.key) == key || (key != null && key.equals(k))))
            return first;
        if ((e = first.next) != null) {

            // 如果链表已经转为红黑树时,则在树中查找
            if (first instanceof TreeNode)
                return ((TreeNode<K,V>)first).getTreeNode(hash, key);
            do {

                // 遍历链表查询
                if (e.hash == hash &&
                    ((k = e.key) == key || (key != null && key.equals(k))))
                    return e;
            }  while ((e = e.next) != null);
        }
    }
    return null;
}
插入方法
在 jdk1.7,hashMap 的输入方法是头插法,而在 jdk1.8 用的则是尾插法
public V put(K key, V value) {
    return putVal(hash(key), key, value, false, true);
}
final V putVal(int hash, K key, V value, boolean onlyIfAbsent,
boolean evict) {
Node<K,V>[] tab; Node<K,V> p; int n, i;
// table 是链表数组,初始为 null,则调用 resize() 方法初始化数组
if ((tab = table) == null || (n = tab.length) == 0)
n = (tab = resize()).length;
// 通过 (n - 1) & hash 寻址,如果当前链表为 null,则直接插入
if ((p = tab[i = (n - 1) & hash]) == null)
tab[i] = newNode(hash, key, value, null);
else {
Node<K,V> e; K k;
// 头节点的 key 等于新数据的,则在下方直接覆盖旧值
if (p.hash == hash &&
((k = p.key) == key || (key != null && key.equals(k))))
e = p;
// 如果链表变成 红黑树,则在树中处理
else if (p instanceof TreeNode)
e = ((TreeNode<K,V>)p).putTreeVal(this, tab, hash, key, value);
// 遍历链表
else {
for (int binCount = 0; ; ++binCount) {
// 遍历到尾部,在尾部插入新数据
if ((e = p.next) == null) {
p.next = newNode(hash, key, value, null);
// 当节点数量大于 8 时,则转为红黑树
if (binCount >= TREEIFY_THRESHOLD - 1) // -1 for 1st
treeifyBin(tab, hash);
break;
}
// 链表中存在同 key 的数据,同样也在下方覆盖
if (e.hash == hash &&
((k = e.key) == key || (key != null && key.equals(k))))
break;
p = e;
}
}
// 覆盖旧值,并返回旧值
if (e != null) { // existing mapping for key
V oldValue = e.value;
if (!onlyIfAbsent || oldValue == null)
e.value = value;
// 空方法,给子类实现
afterNodeAccess(e);
return oldValue;
}
}
// 节点数量 +1
++modCount;
// 进行扩容
if (++size > threshold)
resize();
// 空方法,给子类实现
afterNodeInsertion(evict);
return null;
} 链表转树的过程
final void treeifyBin(Node<K,V>[] tab, int hash) {
    int n, index; Node<K,V> e;

    // 当数组元素少于 64 时,继续进行扩容,扩容之后再把指定索引位置的链表转树
    if (tab == null || (n = tab.length) < MIN_TREEIFY_CAPACITY)
        resize();
    else if ((e = tab[index = (n - 1) & hash]) != null) {

        // 定义头节点、尾节点
        TreeNode<K,V> hd = null, tl = null;
        do {
            // 创建树对象
            TreeNode<K,V> p = replacementTreeNode(e, null);
            // 将树节点串起来,尾插法
            if (tl == null)
                hd = p;
            else {
                p.prev = tl;
                tl.next = p;
            }
            tl = p;
        }  while ((e = e.next) != null);

        // 将树节点的首节点赋值给数组元素
        if ((tab[index] = hd) != null)
            // 将节点构造成树
            hd.treeify(tab);
    }
}
replacementTreeNode 方法只是创建树节点
TreeNode<K,V> replacementTreeNode(Node<K,V> p, Node<K,V> next) {
    return new TreeNode<>(p.hash, p.key, p.value, next);
} 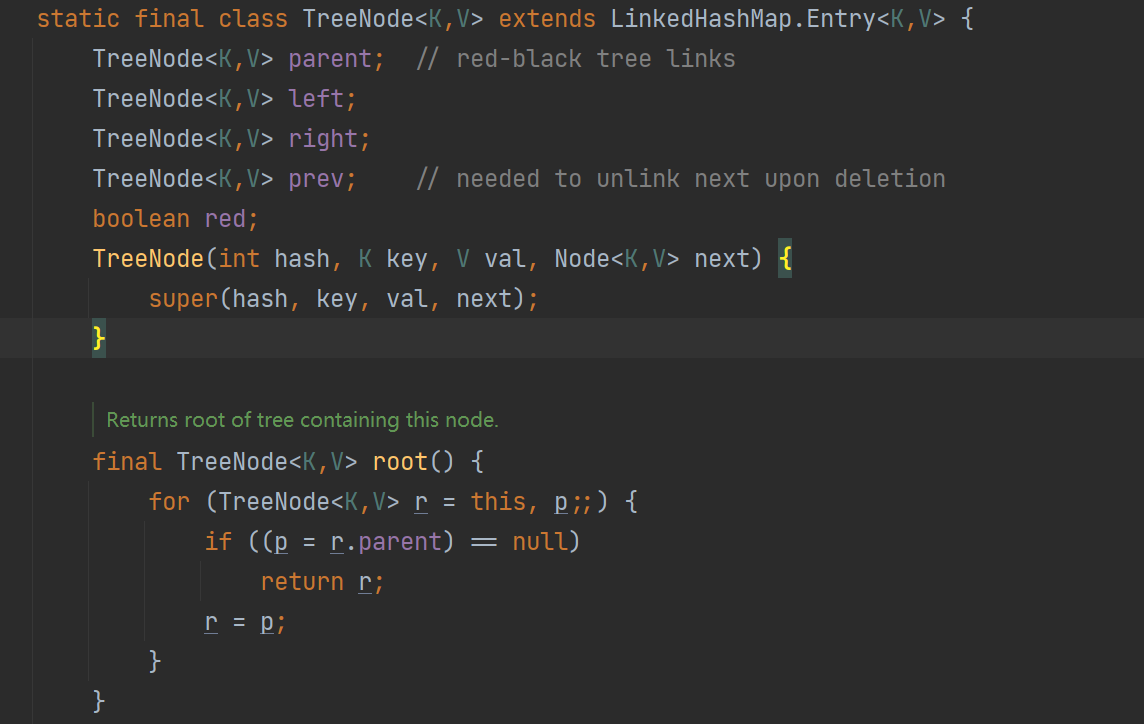
treeify 方法才正式将树节点构造成树,相当于链表转树
final void treeify(Node<K,V>[] tab) {
    TreeNode<K,V> root = null;
    for (TreeNode<K,V> x = this, next; x != null; x = next) {
        next = (TreeNode<K,V>)x.next;
        x.left = x.right = null;
        if (root == null) {
            x.parent = null;
            x.red = false;
            root = x;
        }
        else {
            K k = x.key;
            int h = x.hash;
            Class<?> kc = null;
            for (TreeNode<K,V> p = root;;) {
                int dir, ph;
                K pk = p.key;
                if ((ph = p.hash) > h)
                    dir = -1;
                else if (ph < h)
                    dir = 1;
                else if ((kc == null &&
                          (kc = comparableClassFor(k)) == null) ||
                         (dir = compareComparables(kc, k, pk)) == 0)
                    dir = tieBreakOrder(k, pk);

                TreeNode<K,V> xp = p;
                if ((p = (dir <= 0) ? p.left : p.right) == null) {
                    x.parent = xp;
                    if (dir <= 0)
                        xp.left = x;
                    else
                        xp.right = x;
                    root = balanceInsertion(root, x);
                    break;
                }
            }
        }
    }
    moveRootToFront(tab, root);
}
红黑树特性
红黑树是一种平衡二叉查找树,是一种数据结构。除了具备二叉查找树特性以外,还具备以下特性
- 根节点是黑色
- 节点是黑色或红色
- 每个叶子节点是黑色
- 红色节点的子节点都是黑色
- 从任意节点到其叶子节点的所有路径都包含相同数目的黑色节点
补充:以上性质强制了红黑树的关键性质从根到叶子的最长的可能路径不多于最短的可能路径的两倍长。保证了红黑树的高效
当我们在对红黑树进行插入和删除等操作时,对树做了修改,那么可能会违背红黑树的性质。过程:先变色如果变色还不满足红黑树的性质,那就进行左旋或者右旋,然后继续变色,以此循环直至符合红黑树的性质
HashMap链表和红黑树转换
- 链表长度大于8,并且表的长度大于64 数组 + 红黑树
- 链表长度大于8,并且表的长度不大于64 数组 + 链表 会扩容
- 当数的节点小于6 数组 + 链表
为什么转成红黑树是8呢?而重新转为链表阈值是6呢?
如果转为链表也是8,那如果在8这个位置发生哈希冲突,那红黑树和链表就会频繁切换,就会浪费资源。
为什么负载因子是0.75
加载因子越大,填满的元素越多,空间利用率越高,但发生冲突的机会变大了
加载因子越小,填满的元素越少,冲突发生的机会减小,但空间浪费了更多了,而且还会提高扩容rehash操作的次数
“冲突的机会”与“空间利用率”之间,寻找一种平衡与折中
扩容
什么时候会发生扩容
元素个数 > 数组长度 * 负载因子 例如 16 * 0.75 = 12,当元素超过12个时就会扩容。
链表长度大于8并且表长小于64,也会扩容
扩容过程
- jdk1.7
创建一个新的table,并调用transfer()方法把旧数组中的数据迁移到新数组中,使用的是头插法,也就是说,新table中链表的顺序和旧列表中是相反的,在HashMap线程不安全的情况下,这种头插法可能会导致死链和数据丢失现象
- jdk1.8
①在resize()方法中,定义了oldCap参数,记录了原table的长度,定义了newCap参数,记录新table长度,newCap是oldCap长度的2倍,然后循环原table,把原table中的每个链表中的每个元素放入新table。
②计算索引做了优化:hash(原始hash) & oldCap(原始容量) == 0 的元素留在原来位置 ,否则新位置 = 旧位置 + oldCap(原始容量)
SynchronizedMap
SynchronizedMap 是 Collections 的静态内部类,用法如下
Map<String,String> map = Collections.synchronizedMap(new HashMap<>());可以看到 SynchronizedMap 是一个实现了Map接口的代理类,该类中对 Map 接口中的方法使用 synchronized 同步关键字来保证对 Map 的操作是线程安全的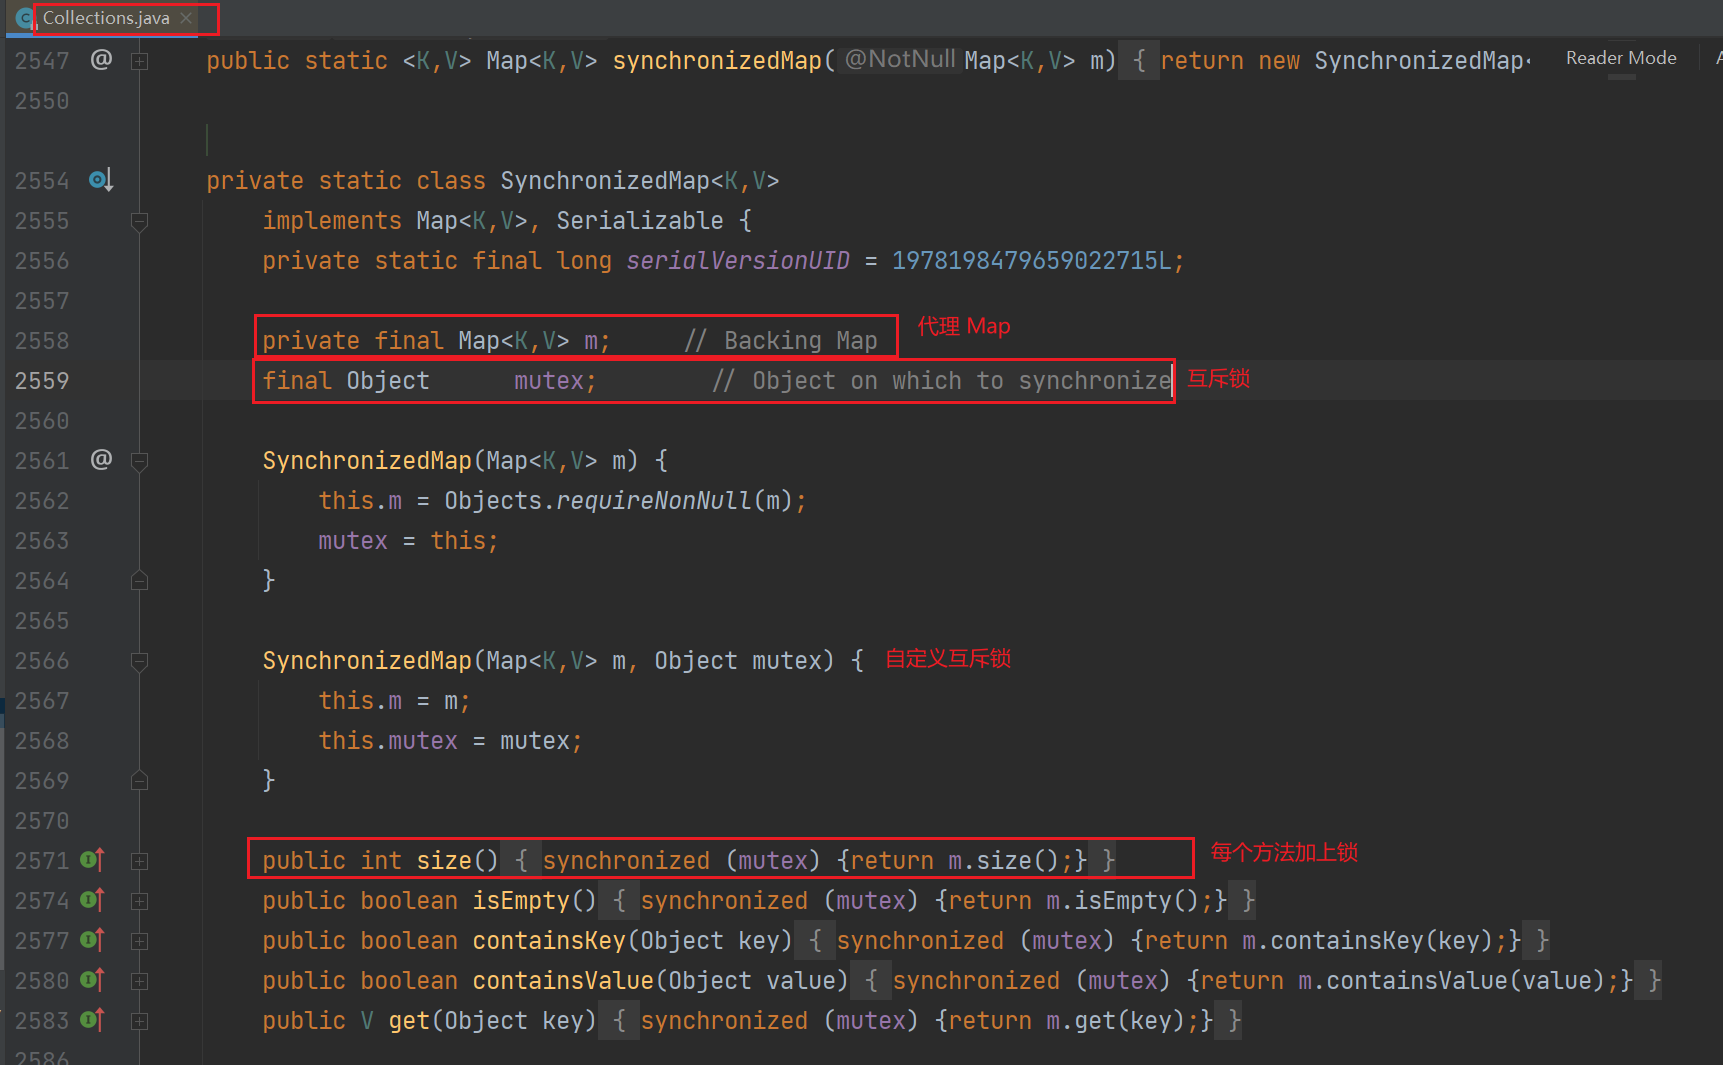
- 本文链接:https://lxjblog.gitee.io/2024/06/17/HashMap/
- 版权声明:本博客所有文章除特别声明外,均默认采用 许可协议。